Getting Started
To integrate OpenAI with your Rapida application, follow these steps:Supported Models
OpenAI offers a variety of models that can be used with this integration. Here’s a table of the supported models:| Model Name | Series | Description |
|---|---|---|
| gpt-4 | GPT-4 | Latest GPT-4 model with improved performance |
| gpt-4-0613 | GPT-4 | June 2023 version of GPT-4 |
| gpt-4o | GPT-4 | Optimized version of GPT-4 |
| gpt-4-turbo-preview | GPT-4 | Preview of the turbo version of GPT-4 |
| gpt-4-turbo | GPT-4 | Turbo version of GPT-4 for faster processing |
| gpt-4.1-mini | GPT-4 | Smaller, faster version of GPT-4.1 |
| gpt-4.1-nano | GPT-4 | Nano-sized version of GPT-4.1 for lightweight applications |
| gpt-3.5-turbo | GPT-3.5 | Optimized version of GPT-3.5 for chat-based applications |
| gpt-3.5-turbo-16k | GPT-3.5 | GPT-3.5 turbo with expanded 16k token context |
| gpt-3.5-turbo-16k-0613 | GPT-3.5 | June 2023 version of GPT-3.5 turbo with 16k token context |
| o3-mini | O Series | Mini version of the O3 model |
| o3 | O Series | Standard O3 model |
| o3-pro | O Series | Professional version of the O3 model |
| o4-mini | O Series | Mini version of the O4 model |
| gpt-4o-mini | O Series | Mini version of GPT-4 optimized |
| o1 | O Series | Standard O1 model |
| o1-pro | O Series | Professional version of the O1 model |
| Model Name | Description |
|---|---|
| text-embedding-3-large | Large version of the text embedding model |
| text-embedding-3-small | Small version of the text embedding model |
| text-embedding-ada-002 | Ada-based text embedding model |
Prerequisites
- Go to the OpenAI platform at https://platform.openai.com.
- Sign up or log in to your OpenAI account.
- Navigate to the API section.
- Click on “Create new secret key” to generate your API key.
- Copy the API key (make sure to save it securely, as it won’t be shown again).
Setting Up Provider Credentials
1
Access the Integrations Page
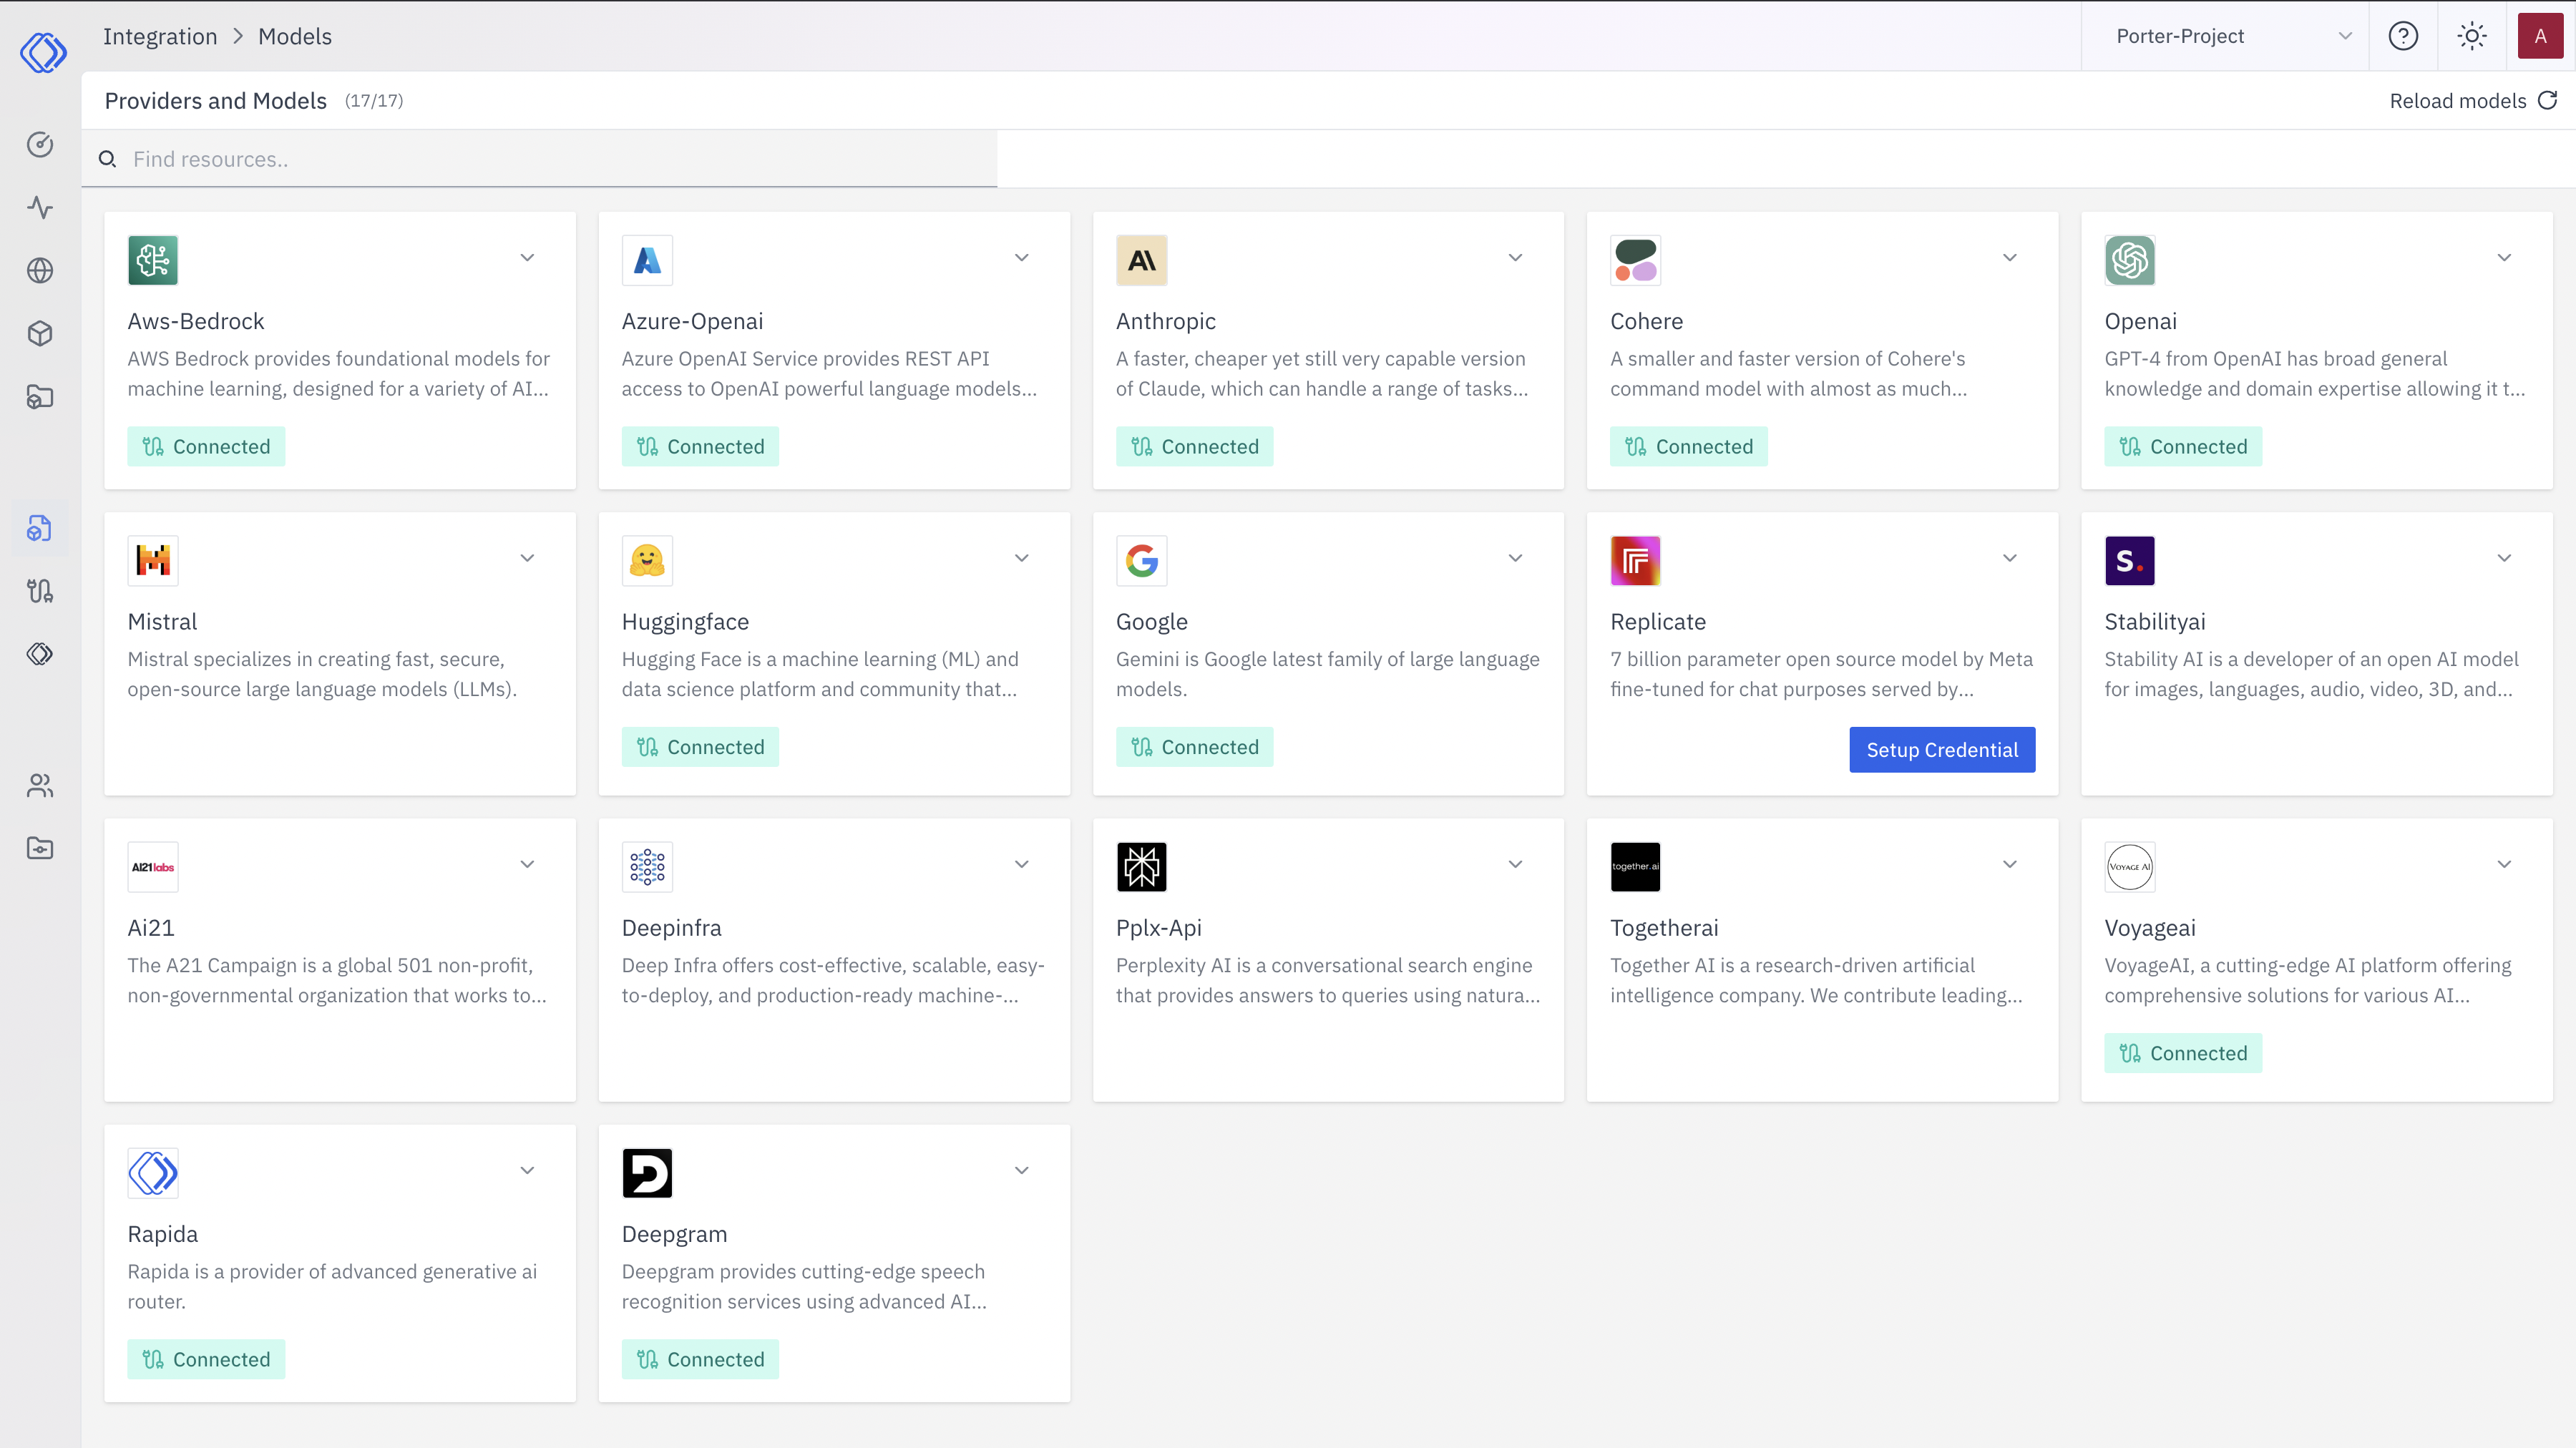
2
Select a Provider
On the Integrations page, find the provider you want to set up credentials for. Each provider card shows a brief description and a “Connected” or “Setup Credential” button.Click the “Setup Credential” button for your chosen provider.
3
Create Provider Credential
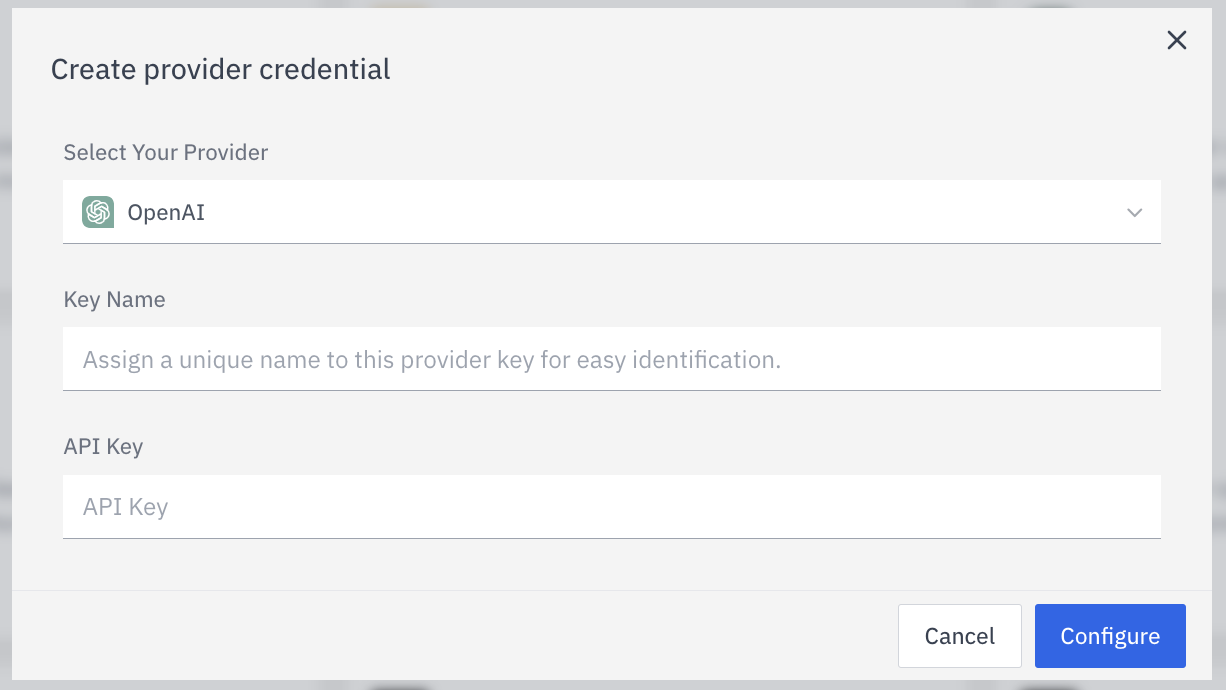
- Select Your Provider from the dropdown (if not already selected)
- Enter a Key Name: Assign a unique name to this provider key for easy identification
- Enter the Key: Input the actual API key or credential for the provider
- Click “Configure” to save the credential
4
Verify Credential Setup
After setting up the credential, you can verify it’s been added:
- The provider card should now show “Connected”
- If you click on the provider, you’ll see a “View provider credential” modal
- This modal displays the credential name, when it was last updated, and options to delete or close