Initiate Invitation
Click on the “Create new user” or “Invite new user” button, typically located
at the top right of the user listing.
Fill in User Details
In the “Invite new user” dialog that appears, provide the following information: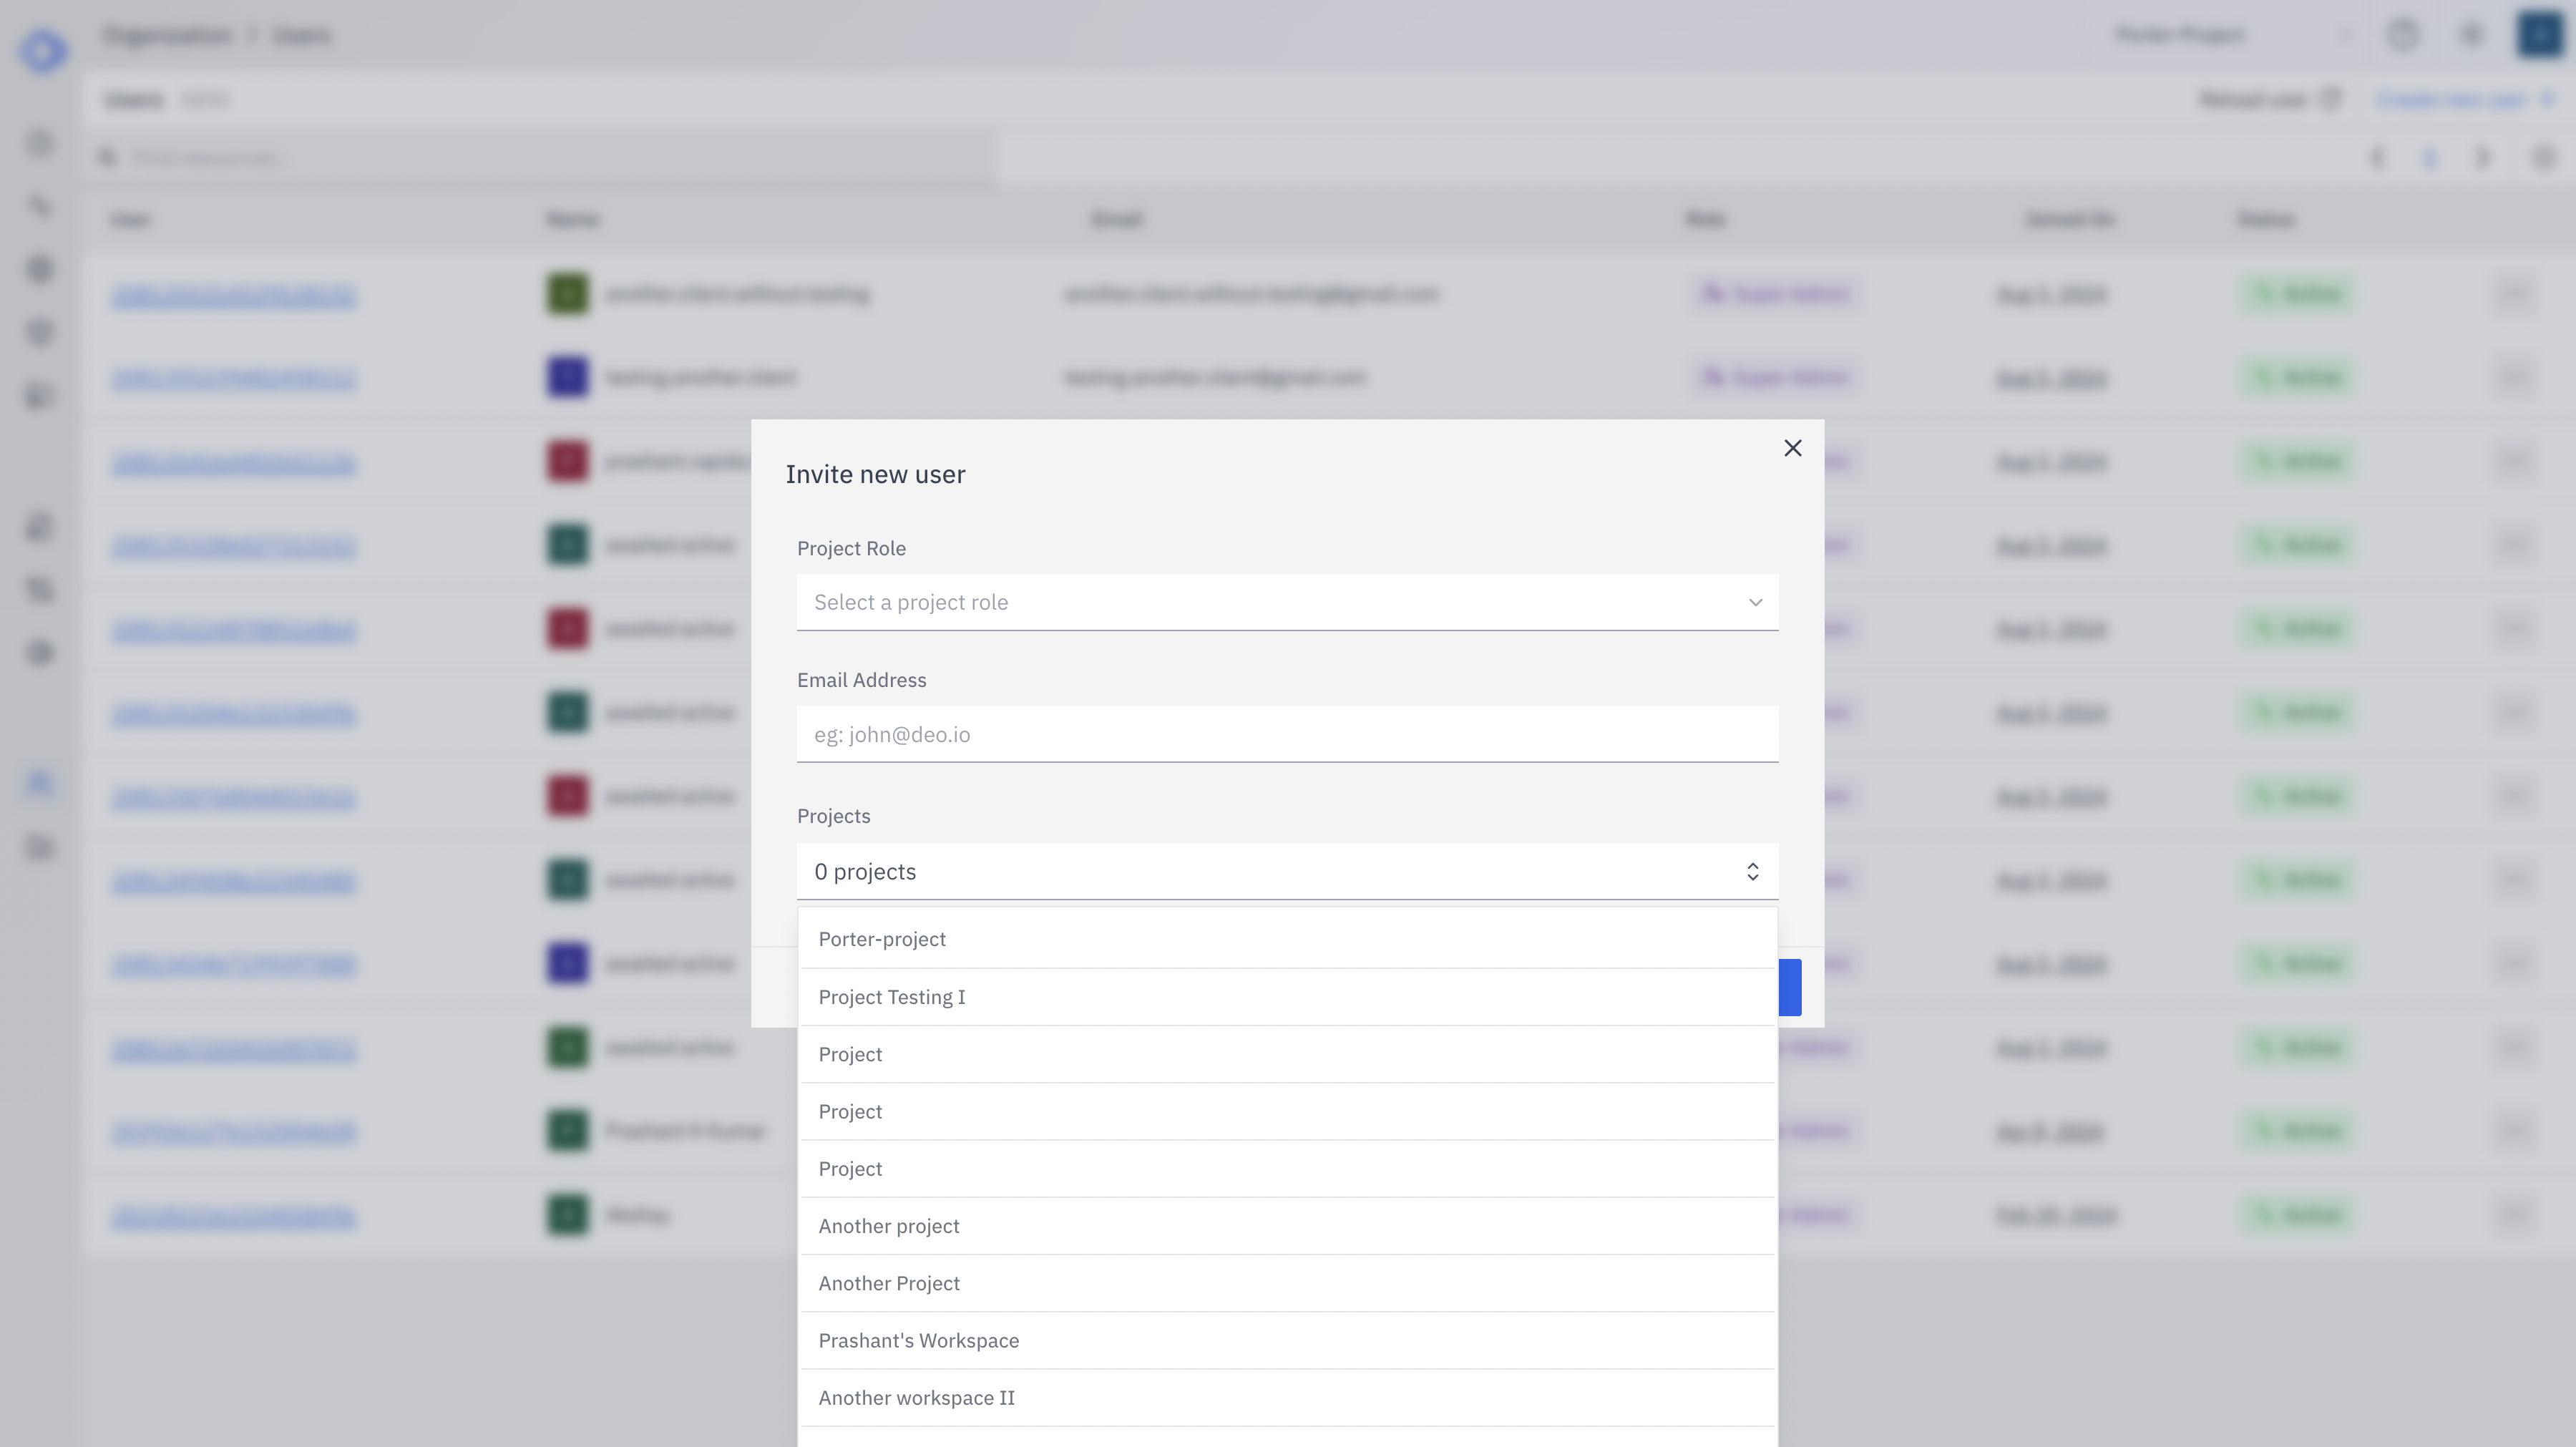
- Project Role: Select the appropriate role from the dropdown (e.g., Super Admin, Admin, Writer, Reader).
- Email Address: Enter the email address of the person you’re inviting.
- Projects: Choose which project(s) to give the new user access to.
Set Permissions
Depending on the selected role, you may need to specify additional permissions
or access levels.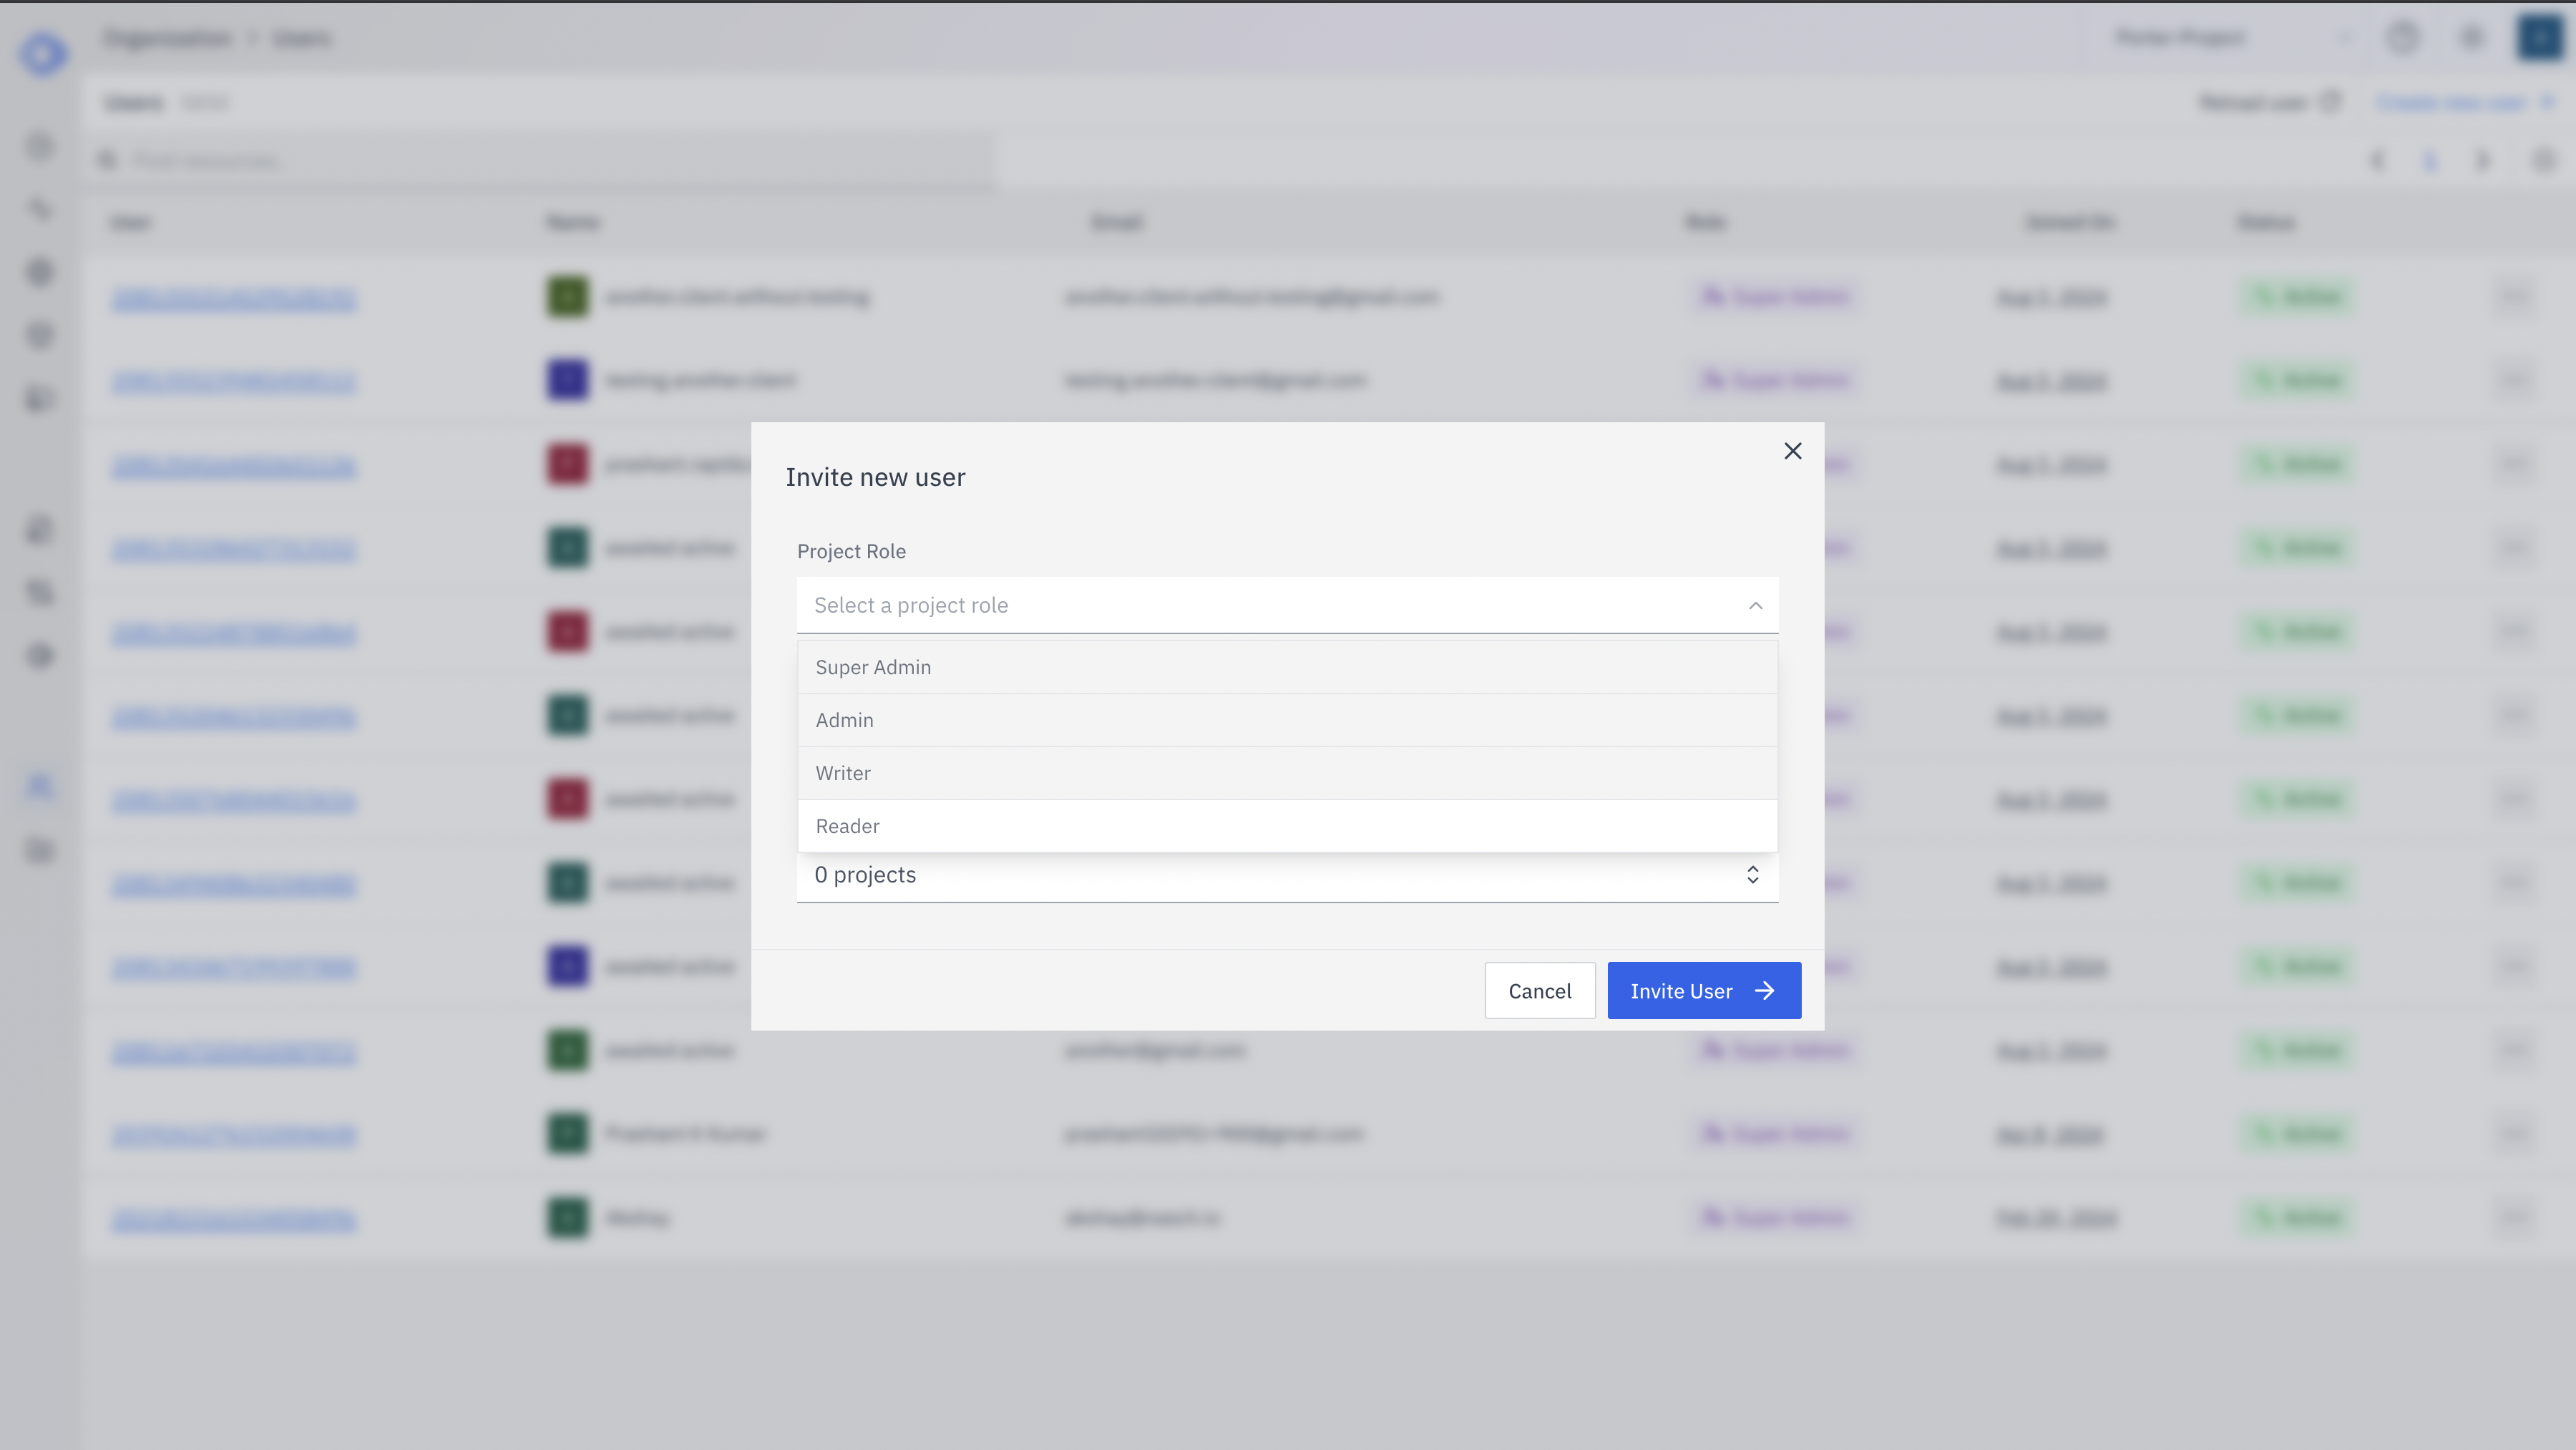
User Roles
When inviting a new user, you can assign one of the following roles:- Super Admin: Full access and control over the organization and all its projects
- Admin: Manage organization resources and users
- Writer: Can edit and contribute to assigned projects
- Reader: Read-only access to permitted resources
Important Considerations
- Ensure you’re assigning the appropriate role for the new user’s responsibilities.
- Double-check the email address to avoid sending invitations to the wrong person.
- Be mindful of which projects you’re granting access to, especially for sensitive or confidential work.
After Sending the Invitation
- The invited user will receive an email with instructions to join the workspace.
- They will need to create an account or log in if they already have one.
- Once they accept the invitation, they’ll have access based on the role and projects you’ve assigned.
Best Practices
- Regularly review and update user roles and project access as team responsibilities change.
- Implement a standard onboarding process for new users to familiarize them with your workspace setup and guidelines.
- Periodically audit user accounts to ensure all active users still require access.