Prerequisites
Before creating an endpoint, ensure that you have integrated the desired AI provider with Rapida. To set up integrations:- Navigate to the Integrations section in your Rapida dashboard.
- Select the AI provider you want to integrate (e.g., OpenAI, Anthropic, Google AI).
- Follow the provider-specific instructions to complete the integration.
Choose Model
Select the LLM Provider you want to use for your endpoint. The interface shows various options.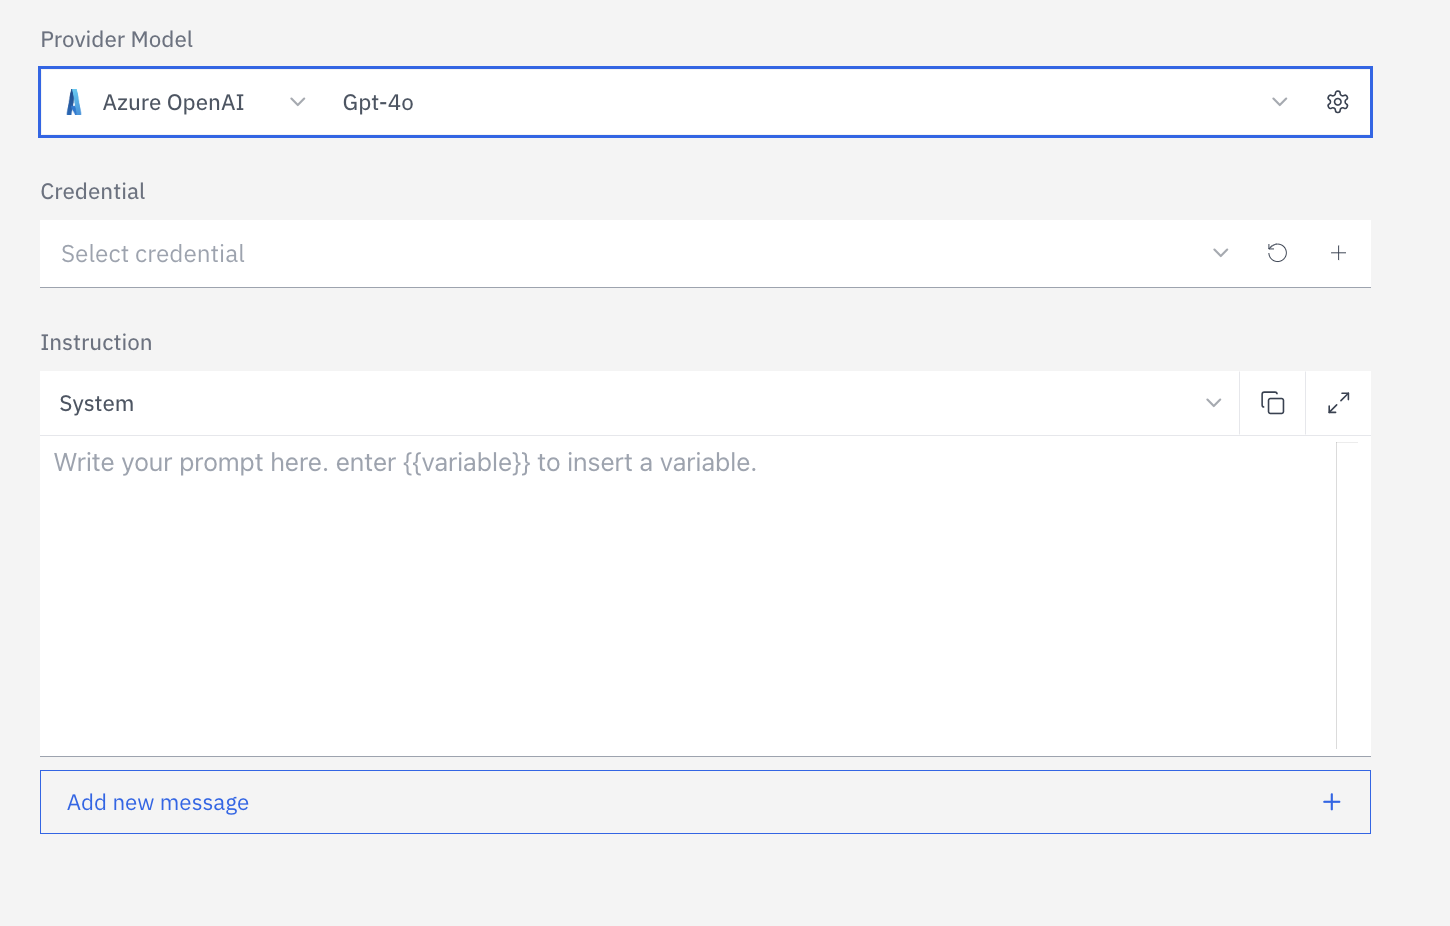
Each model may have different capabilities and pricing structures, so choose
the one that best fits your needs.
Select Provider Credential
Choose the appropriate credential for the selected provider from the dropdown
menu. If you haven’t set up credentials for this provider yet, you can: -
Click the ”+” button to add a new credential - Click the refresh button to
update the list of available credentials
Make sure you’ve already configured credentials for your chosen provider in
the Integrations section.
Configure Model Settings
Depending on the chosen provider, configure various settings such as Frequency Penalty, Temperature, Top P, Max Completion Tokens, Response Format, and Stop Sequences by clicking on the settings icon next to the selected model.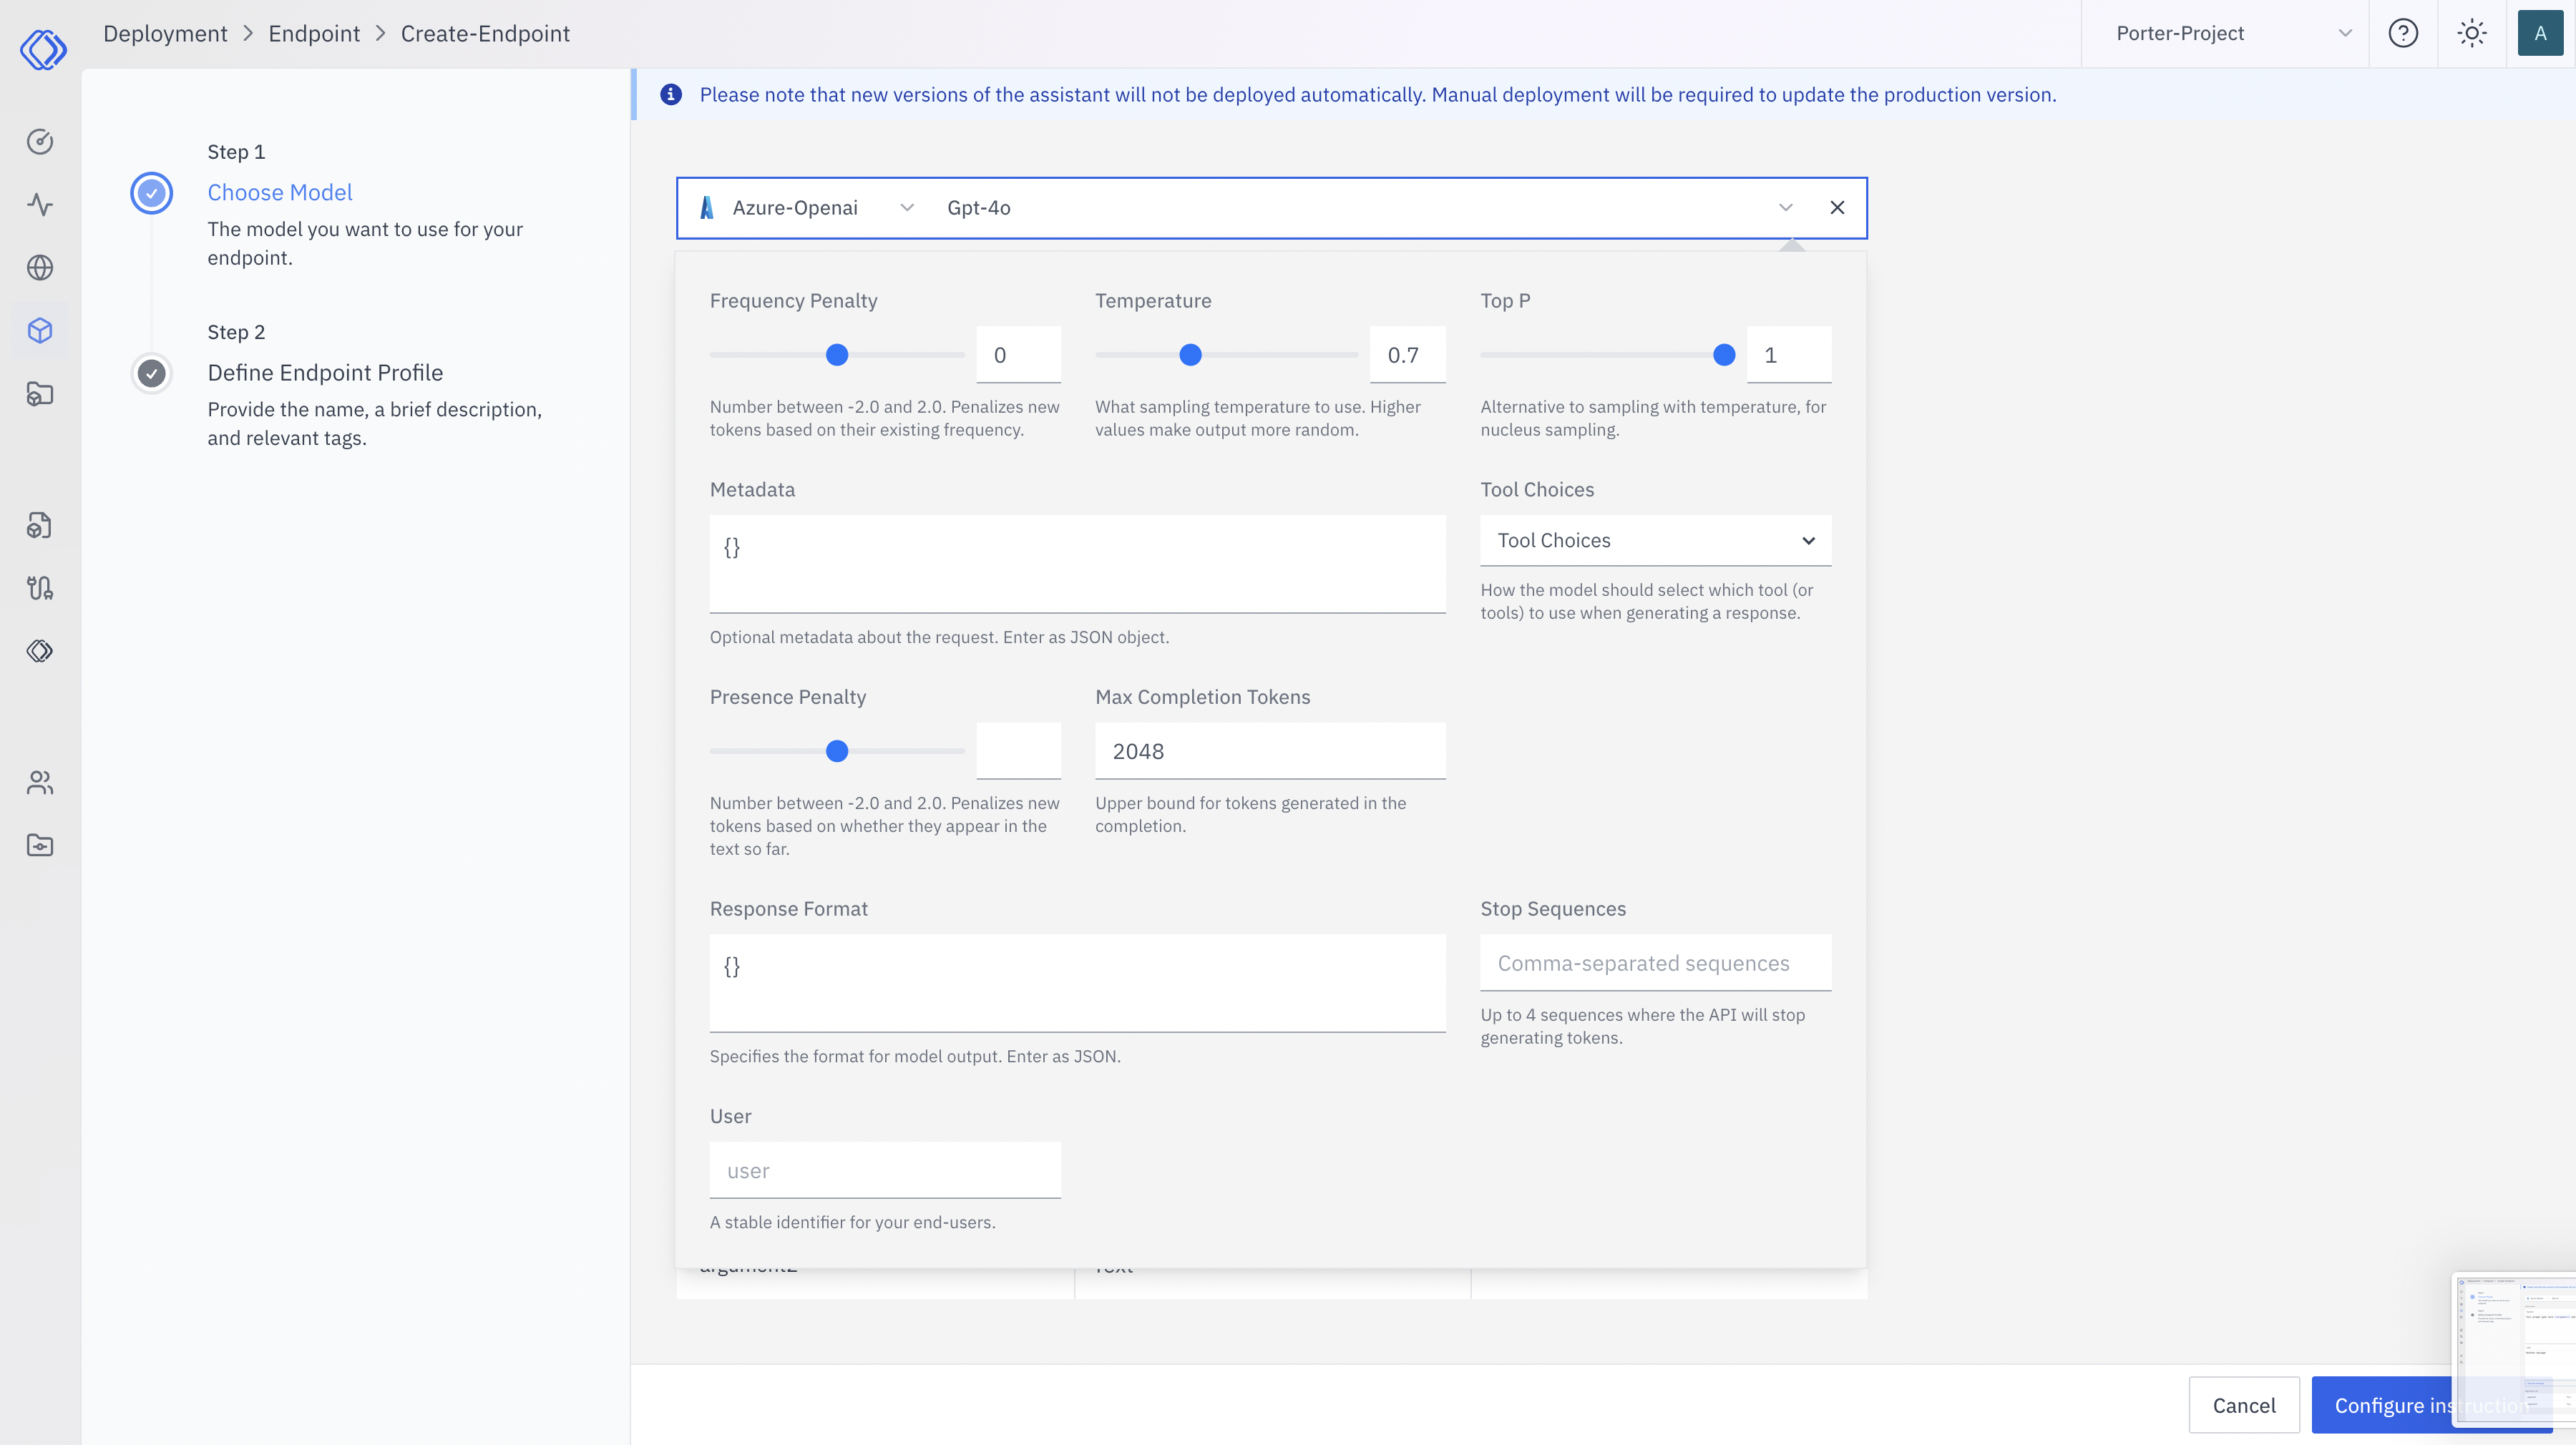
Set Up Instructions
Create a system message and user message template. Define the role or context for the AI, set up the structure for user inputs, and define custom arguments that can be dynamically inserted into your prompts.
Additional Notes
- New versions of the assistant will not be deployed automatically. Manual deployment is required to update the production version.
- You can add multiple messages to create more complex conversation flows.
- The interface allows for easy editing and rearranging of messages.