Documentation Index
Fetch the complete documentation index at: https://doc.rapida.ai/llms.txt
Use this file to discover all available pages before exploring further.
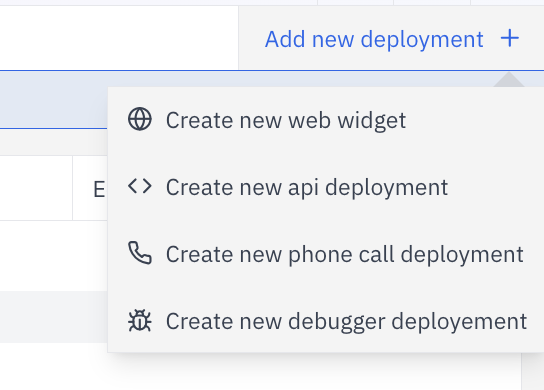
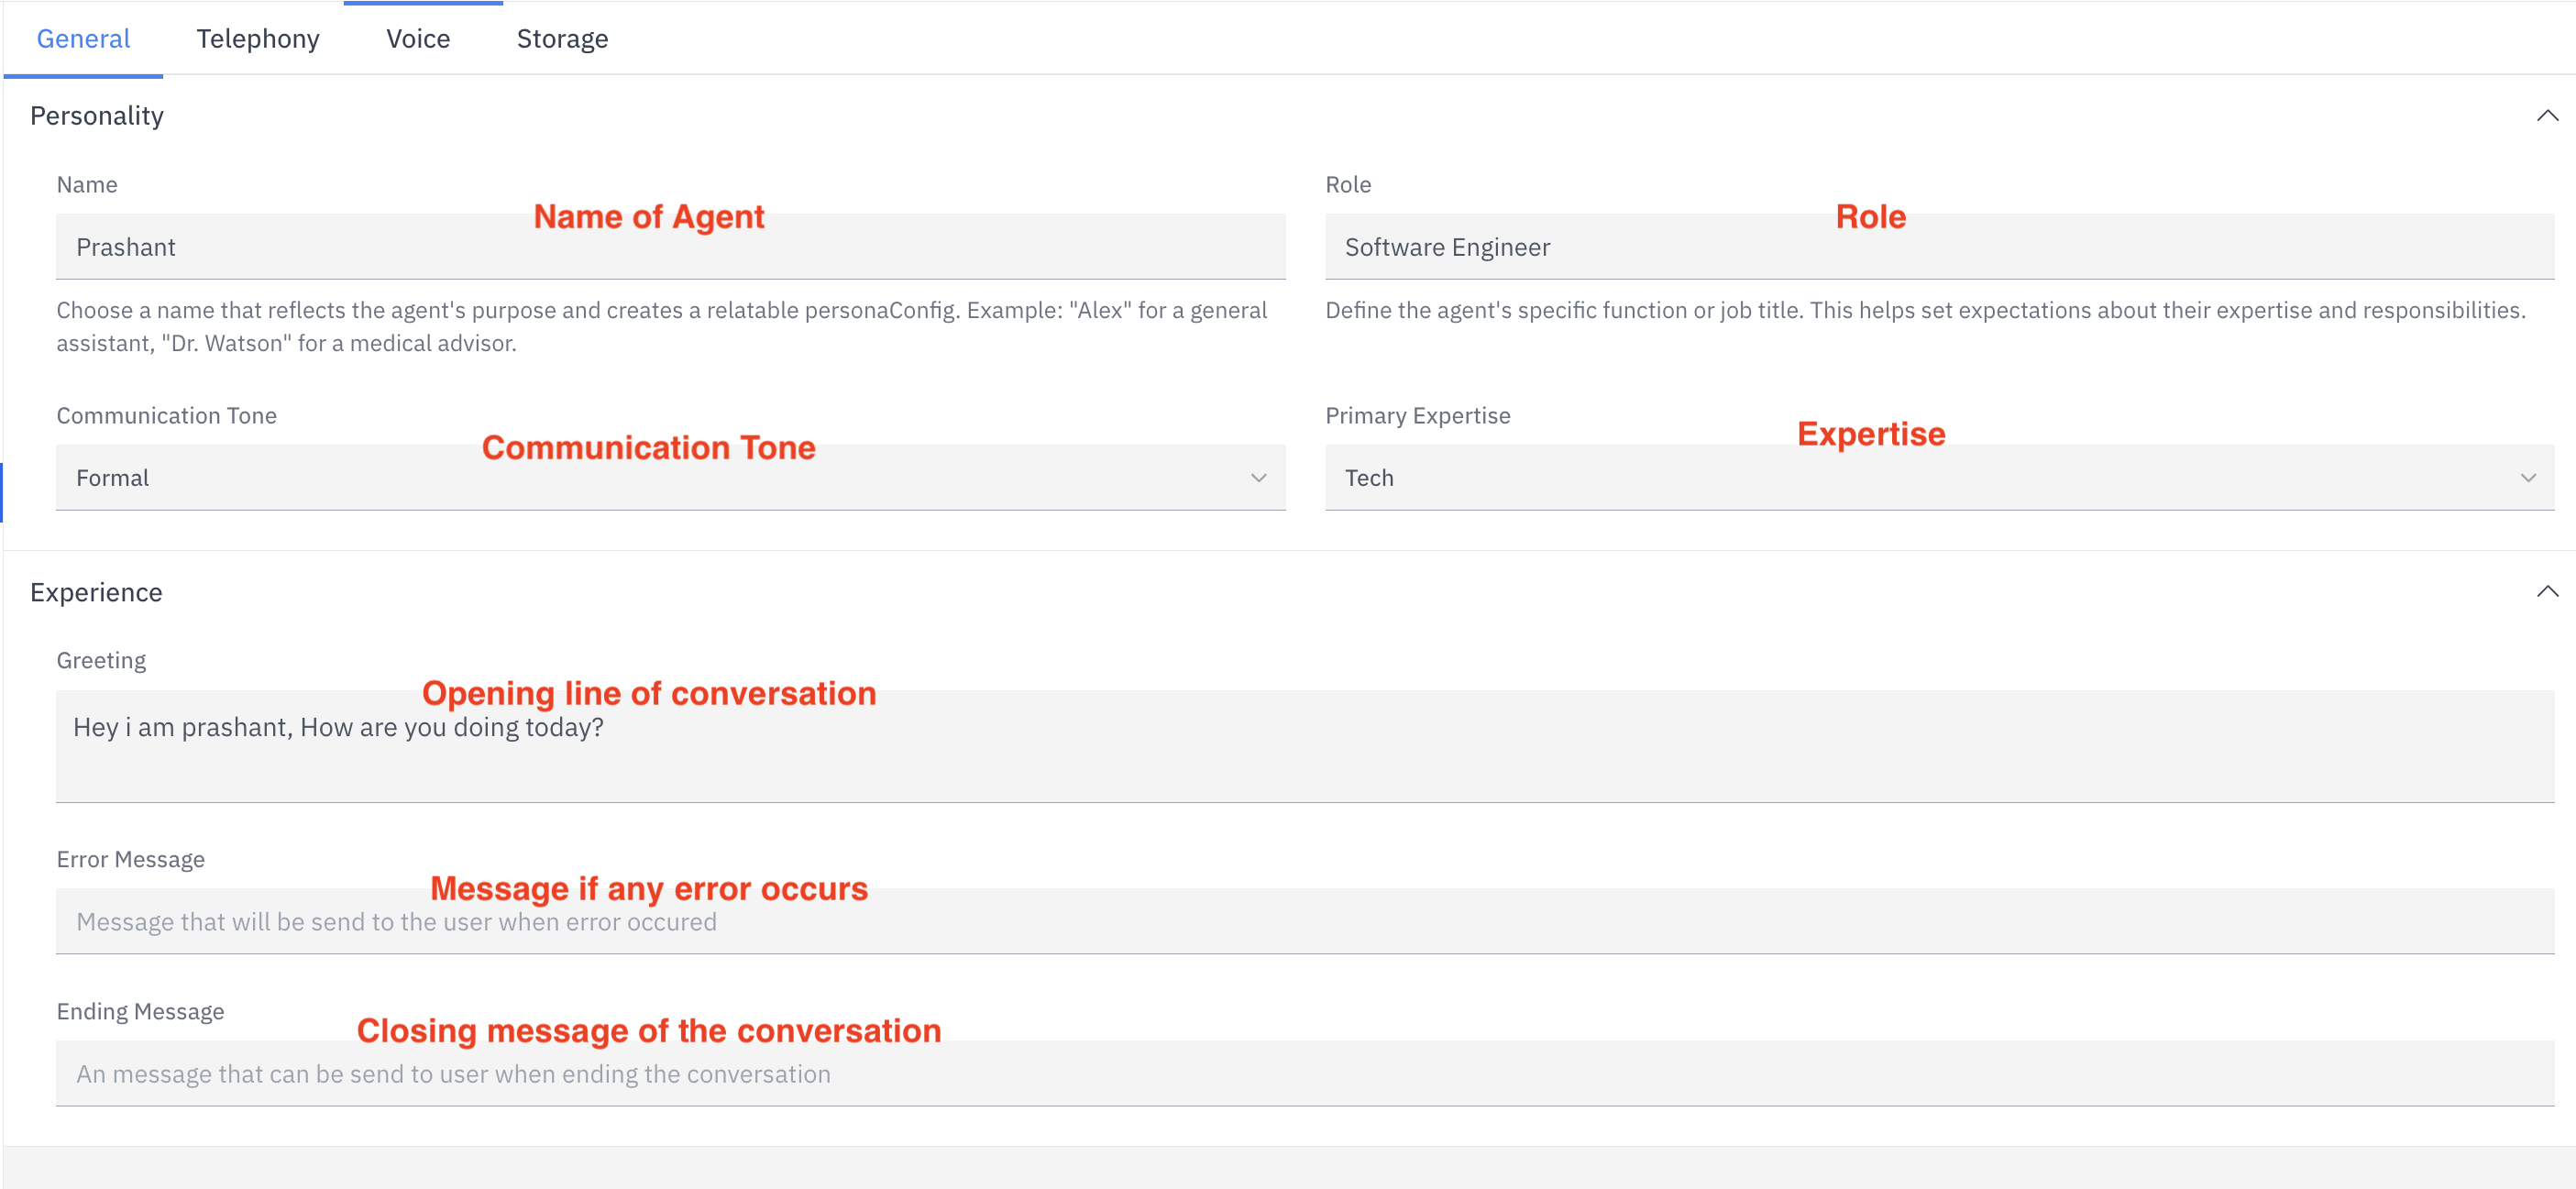
Fill Agent details for Phone call
- Name of Agent: Enter the agent’s name in the Name field.
- Role: Specify the agent’s role in the Role field.
- Communication Tone: Select the tone in the Communication Tone dropdown.
- Expertise: Choose the agent’s expertise area in Primary Expertise.
- Opening Line of Conversation: Type the greeting in the Greeting field.
- Message if Any Error Occurs: Input the error message in Error Message.
-
Closing Message of the Conversation: Fill in the ending message in Ending Message.
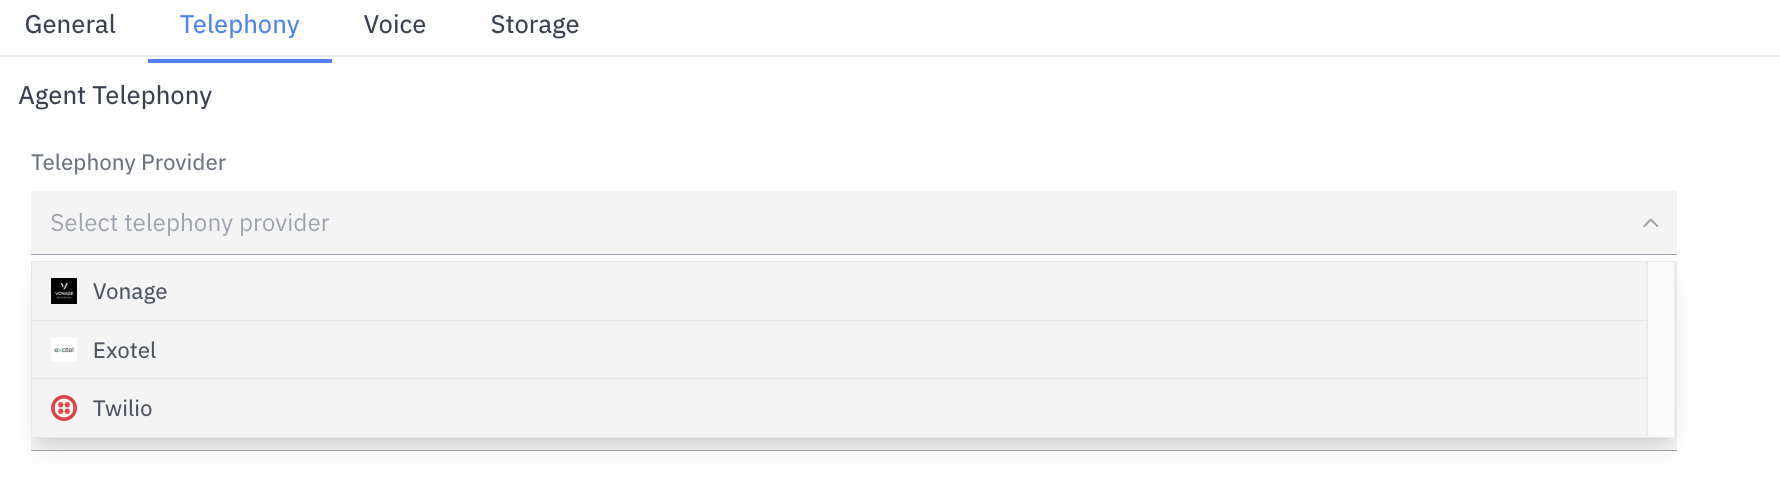
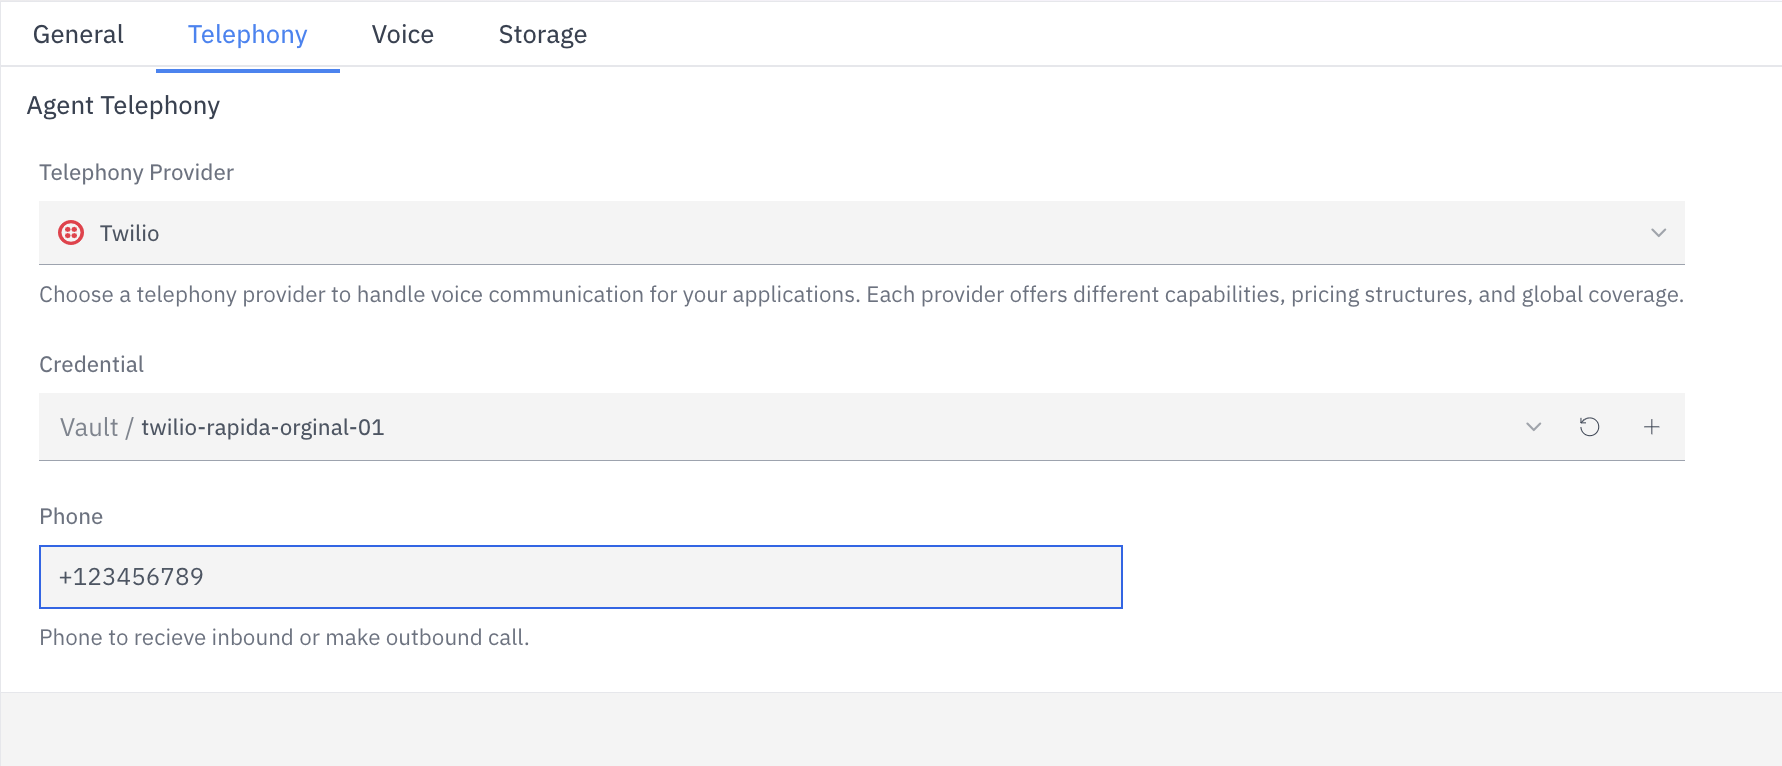
Configure Telephony Settings
Set up your telephony integration:
-
Select telephony provider (Twilio, Vonage, or Exotel)
-
Select credentials for the provider from your stored credentials
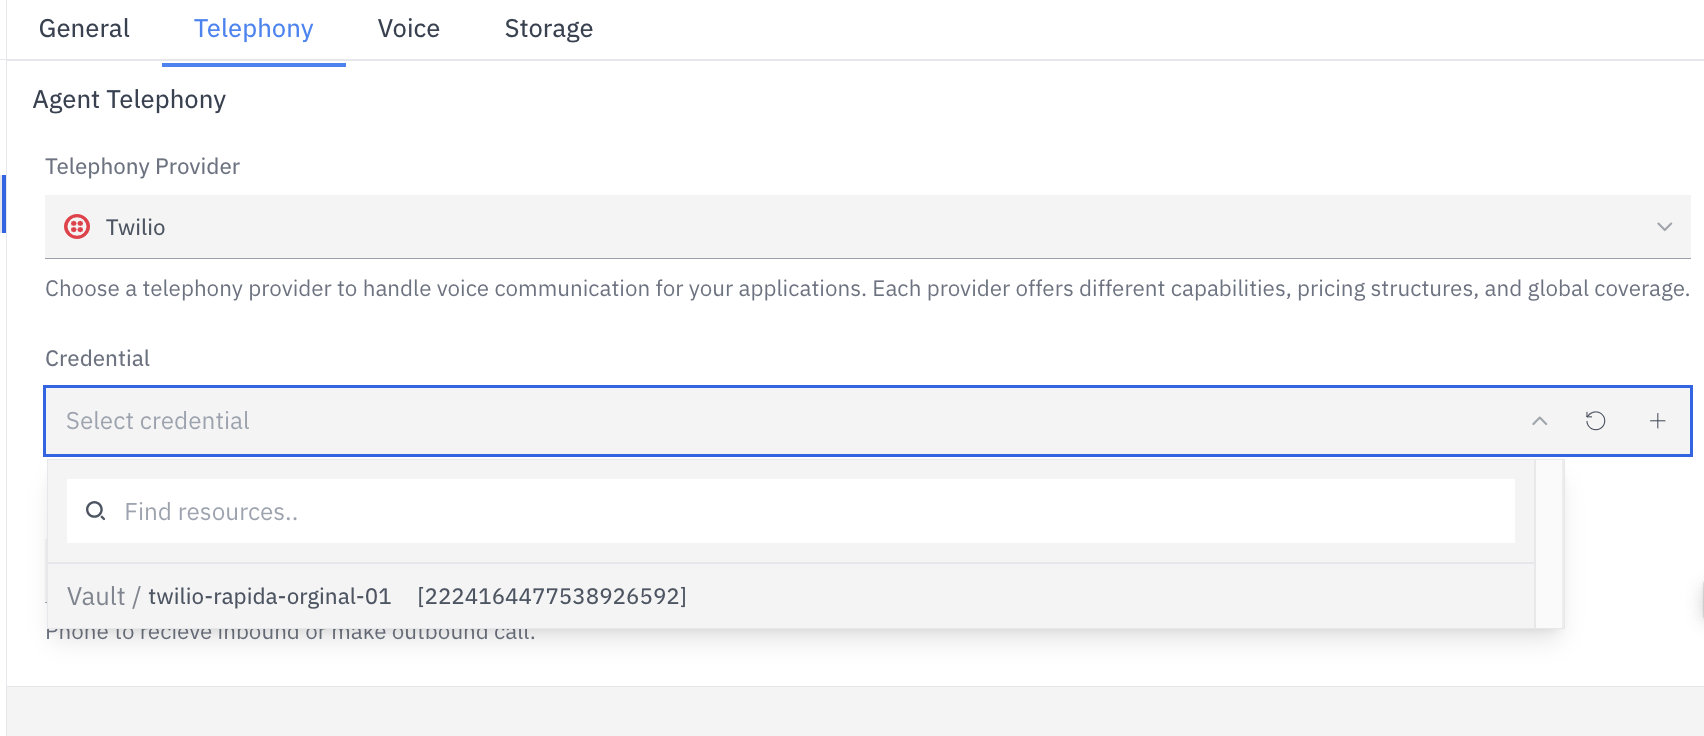
-
Provide the associated phone number from which outbound calls will be made
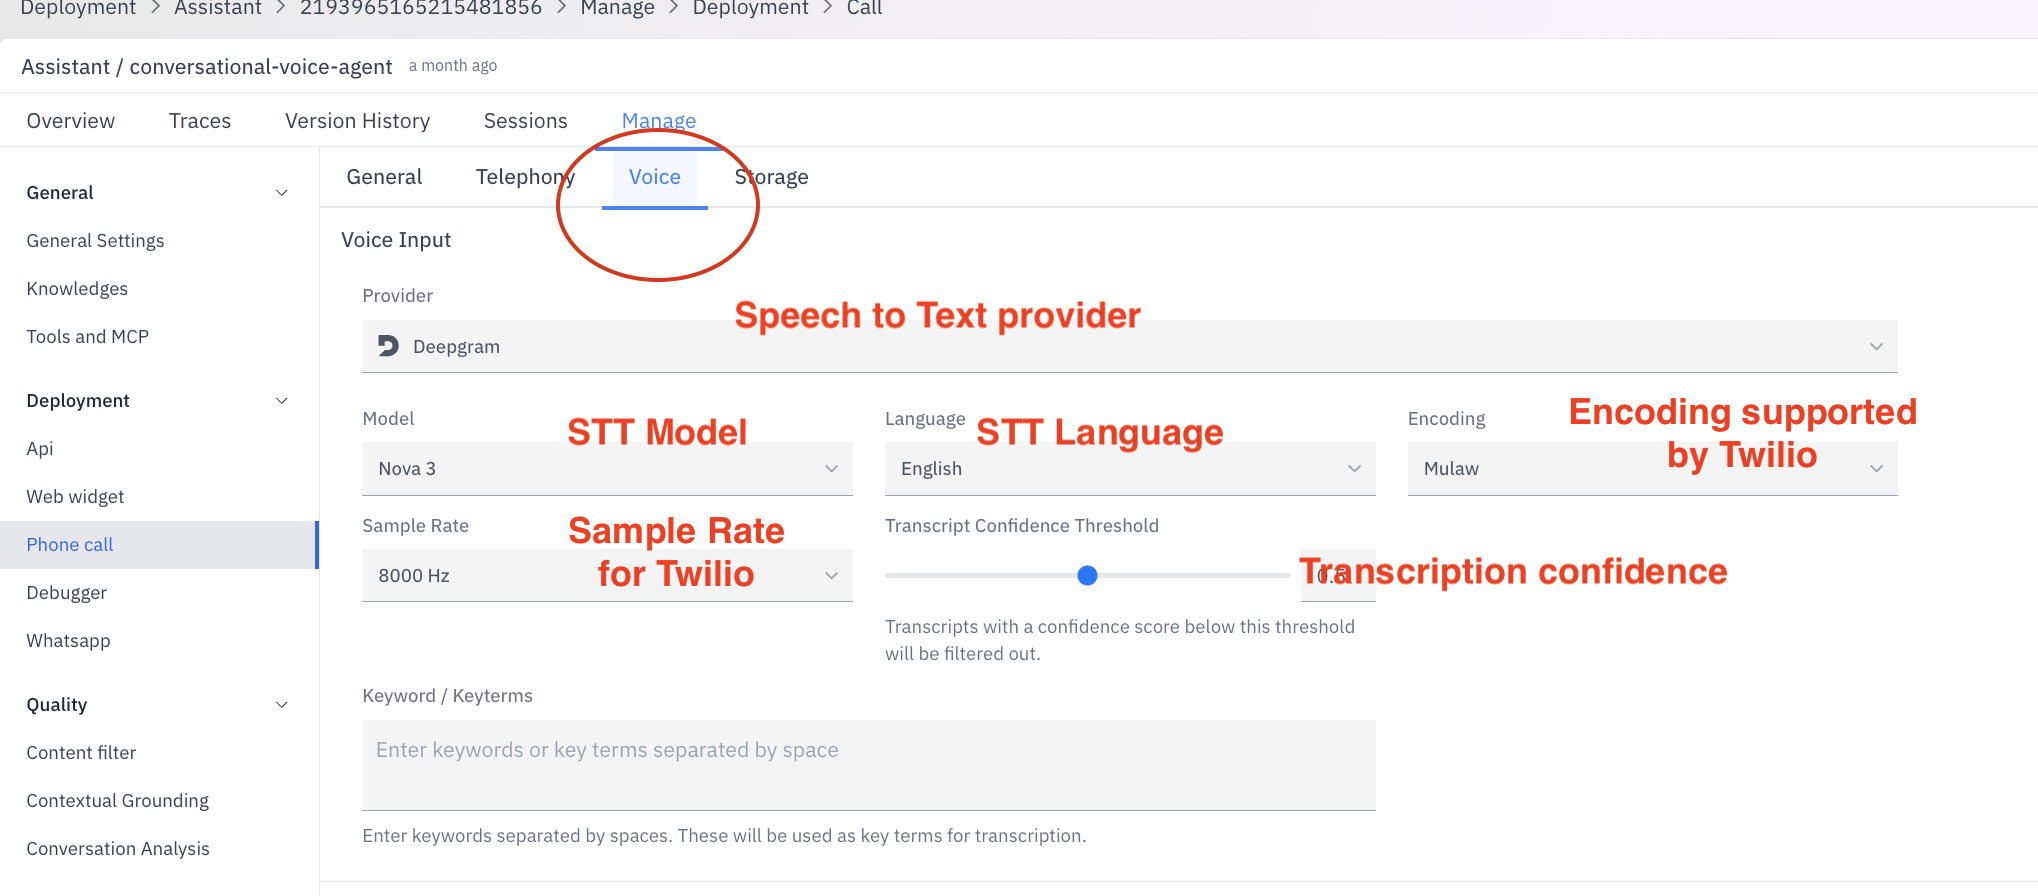
Select Speech to Text Configuration
Select the following parameters for your Speech to Text provider.
- Choice: Deepgram.
- Model. Example : Nova -3 for Deepgram
- Language
- Encoding: Select Mulaw for Twilio
- Required sample rate.
-
Transcript Confidence Threshold
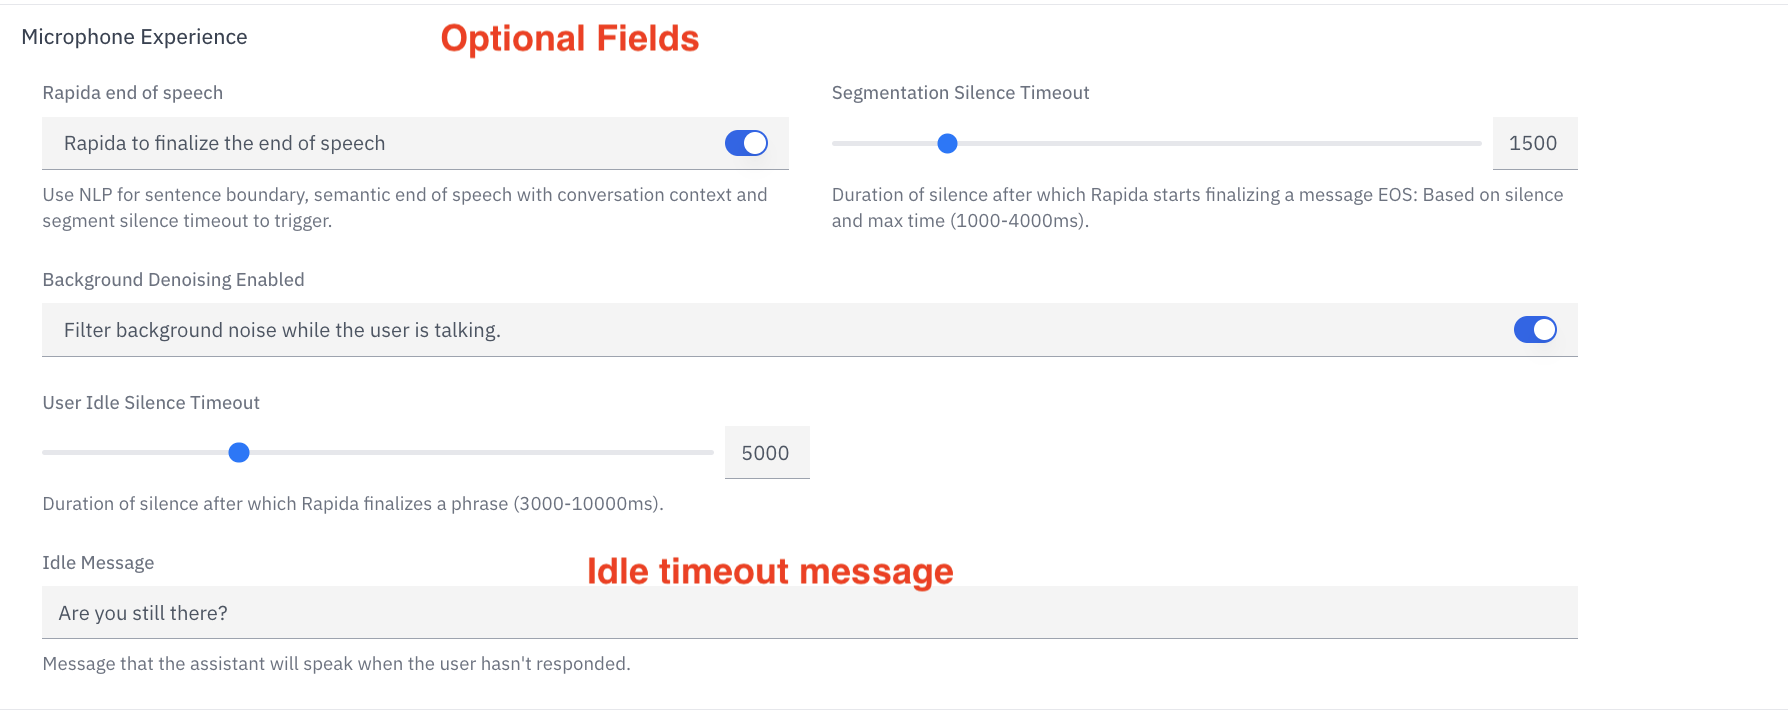
Configure phone call behavior
Select relevant configuration for your assistant
- Rapida to finalize the end of speech. Disable this if you do not want automatic end of speech detection.
- Select correct values for Segmentation Silence Timeout. This is the duration of silence after which Rapida starts finalizing a message EOS: Based on silence and max time (1000-4000ms).
- Background Denoising Enabled. Default active. Disabling this will affect performance of Speech to Text transcription.
- User Idle Silence Timeout. After this Duration of silence, Rapida finalizes a phrase (3000-10000ms) and sends it back as audio response.
-
Idle Message: Message that the assistant will speak when the user hasn’t responded until the Idle Silence Timeout.
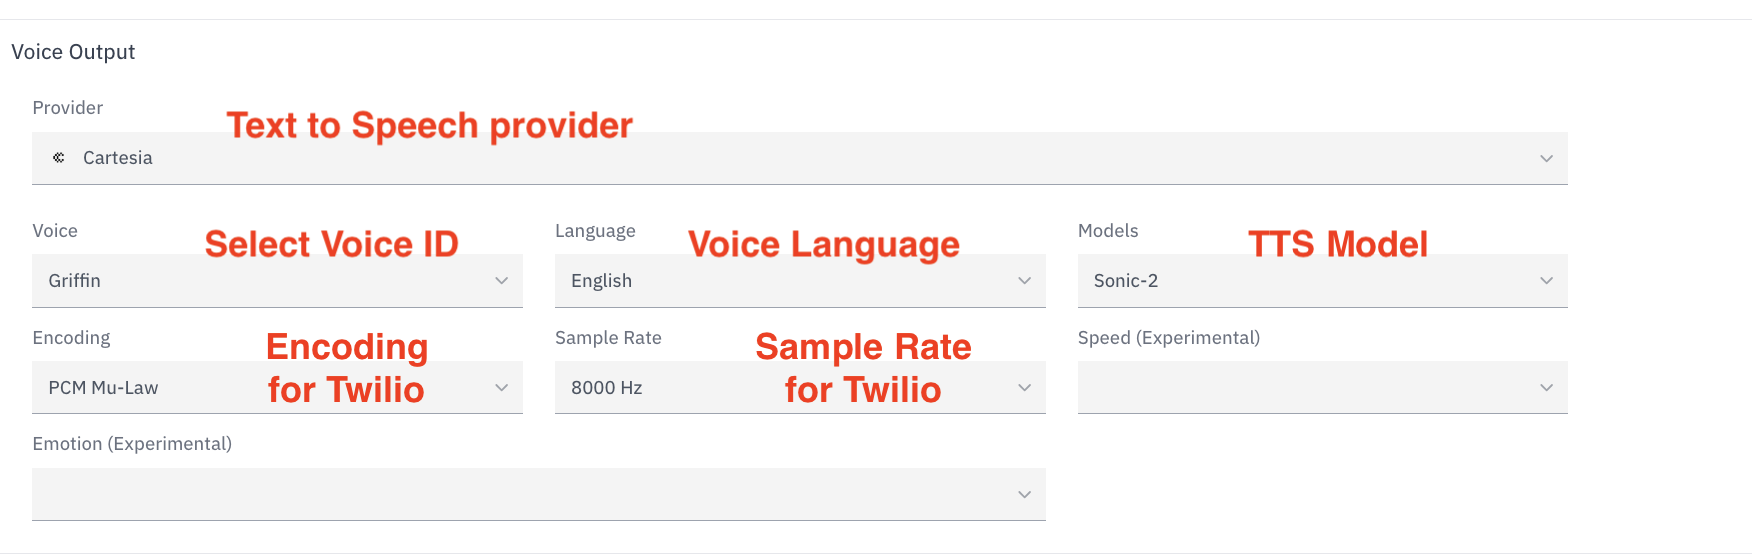
Select Text to Speech Configuration
Select the following parameters for your Text to Speech provider.
- Provider Choice: Cartesia.
- Model. Example : Sonic - 2 for Cartesia
- Language
- Voice Id
- Encoding: Select PCM Mulaw for Twilio
-
Required sample rate.
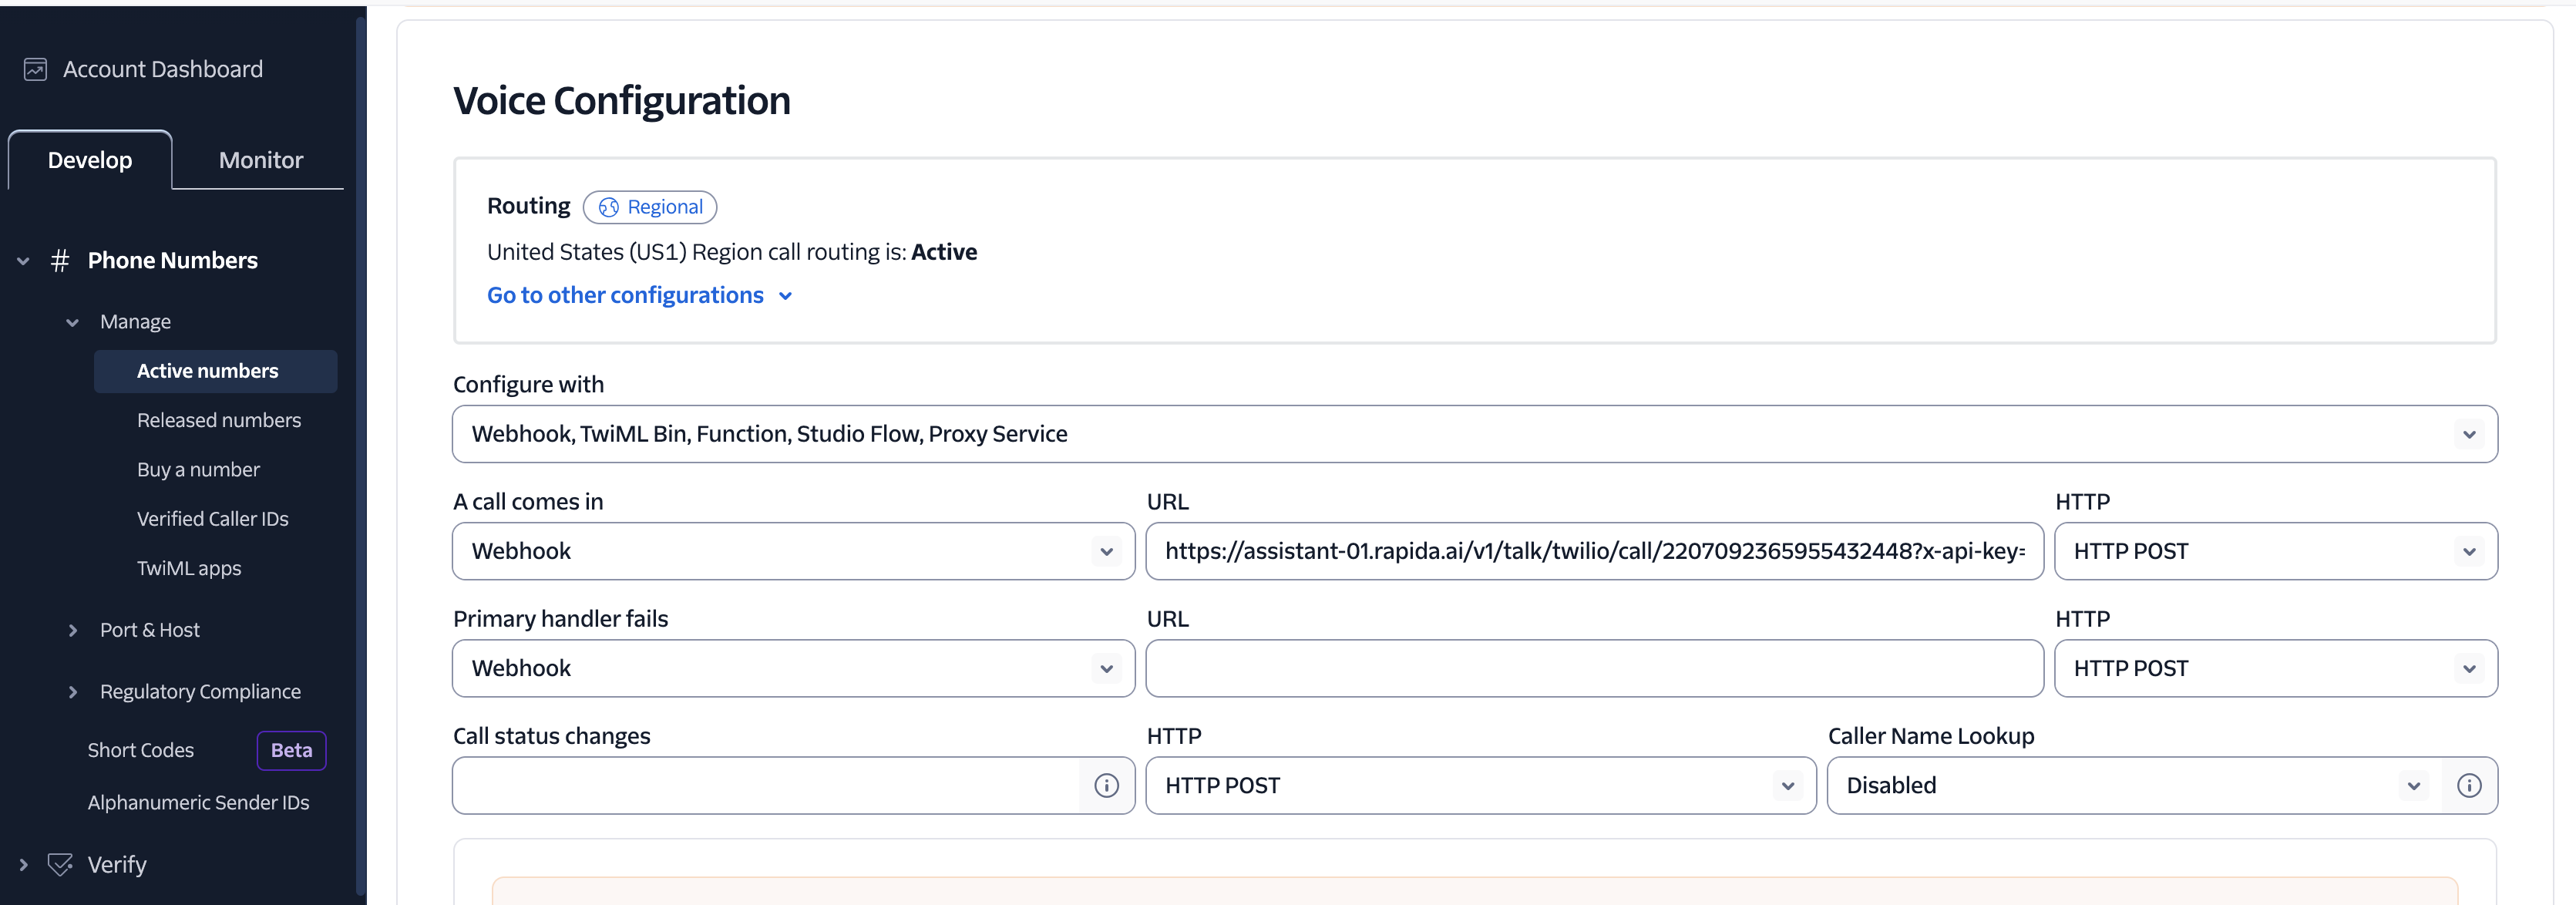
Configuring Rapida Assistant on Twilio
After obtaining your Twilio credentials, you need to configure your Twilio phone number to connect with your Rapida assistant:
- Log in to your Twilio account at https://www.twilio.com/login
- Navigate to “Phone Numbers” → “Manage” → “Active numbers”
- Select the phone number you want to use with Rapida
- Under “Voice & Fax” configuration:
- Set “A CALL COMES IN” to “Webhook”
- Use the following URL format:
- Replace ASSISTANT_ID with your assistant’s unique ID
- Replace RAPIDA_API_KEY with your Rapida API key
- Set the HTTP method to “HTTP POST”
-
Click “Save” to apply the changes