> ## Documentation Index
> Fetch the complete documentation index at: https://doc.rapida.ai/llms.txt
> Use this file to discover all available pages before exploring further.
# Vonage
> Connect your Vonage phone numbers to Rapida AI for inbound and outbound voice AI conversations.
Vonage (now part of Ericsson) is a cloud communications platform providing programmable voice, messaging, and video APIs. Rapida integrates with Vonage to enable AI-powered phone conversations using Vonage's WebSocket media streaming.
Vonage uses **WebSocket audio streams** for real-time media. When a call connects, Vonage opens a WebSocket to Rapida carrying linear PCM audio. Rapida handles all codec conversion and resampling transparently.
## How It Works
```mermaid theme={null}
sequenceDiagram
participant Caller
participant Vonage as Vonage Cloud
participant API as Rapida Webhook API
participant WS as Rapida WebSocket
participant AI as AI Pipeline (STT → LLM → TTS)
Caller->>Vonage: Dials your Vonage number
Vonage->>API: POST /v1/talk/vonage/call/{assistantId}
API->>API: Create conversation + save call context
API-->>Vonage: NCCO (Connect → WebSocket)
rect rgb(230, 255, 230)
Note over Vonage,AI: Media Streaming
Vonage->>WS: WebSocket connect (linear PCM audio)
WS->>AI: Audio → STT → LLM → TTS
AI->>WS: TTS audio
WS->>Vonage: Audio frames
Vonage->>Caller: AI speaks
end
Caller->>Vonage: Hangup
Vonage->>API: Status callback
```
***
## Prerequisites
An active Vonage account with at least one phone number and a Vonage Application
An active Rapida account with a configured voice assistant
You will need your **Vonage Application ID** and **Private Key**, which you can find in the [Vonage API Dashboard](https://dashboard.nexmo.com/).
***
## Step 1: Set Up Provider Credentials
Store your Vonage API credentials in Rapida so the platform can authenticate with Vonage for outbound calls and webhook handling.
Go to **Integration > Tools** in the Rapida dashboard. You will see a grid of available external integrations.
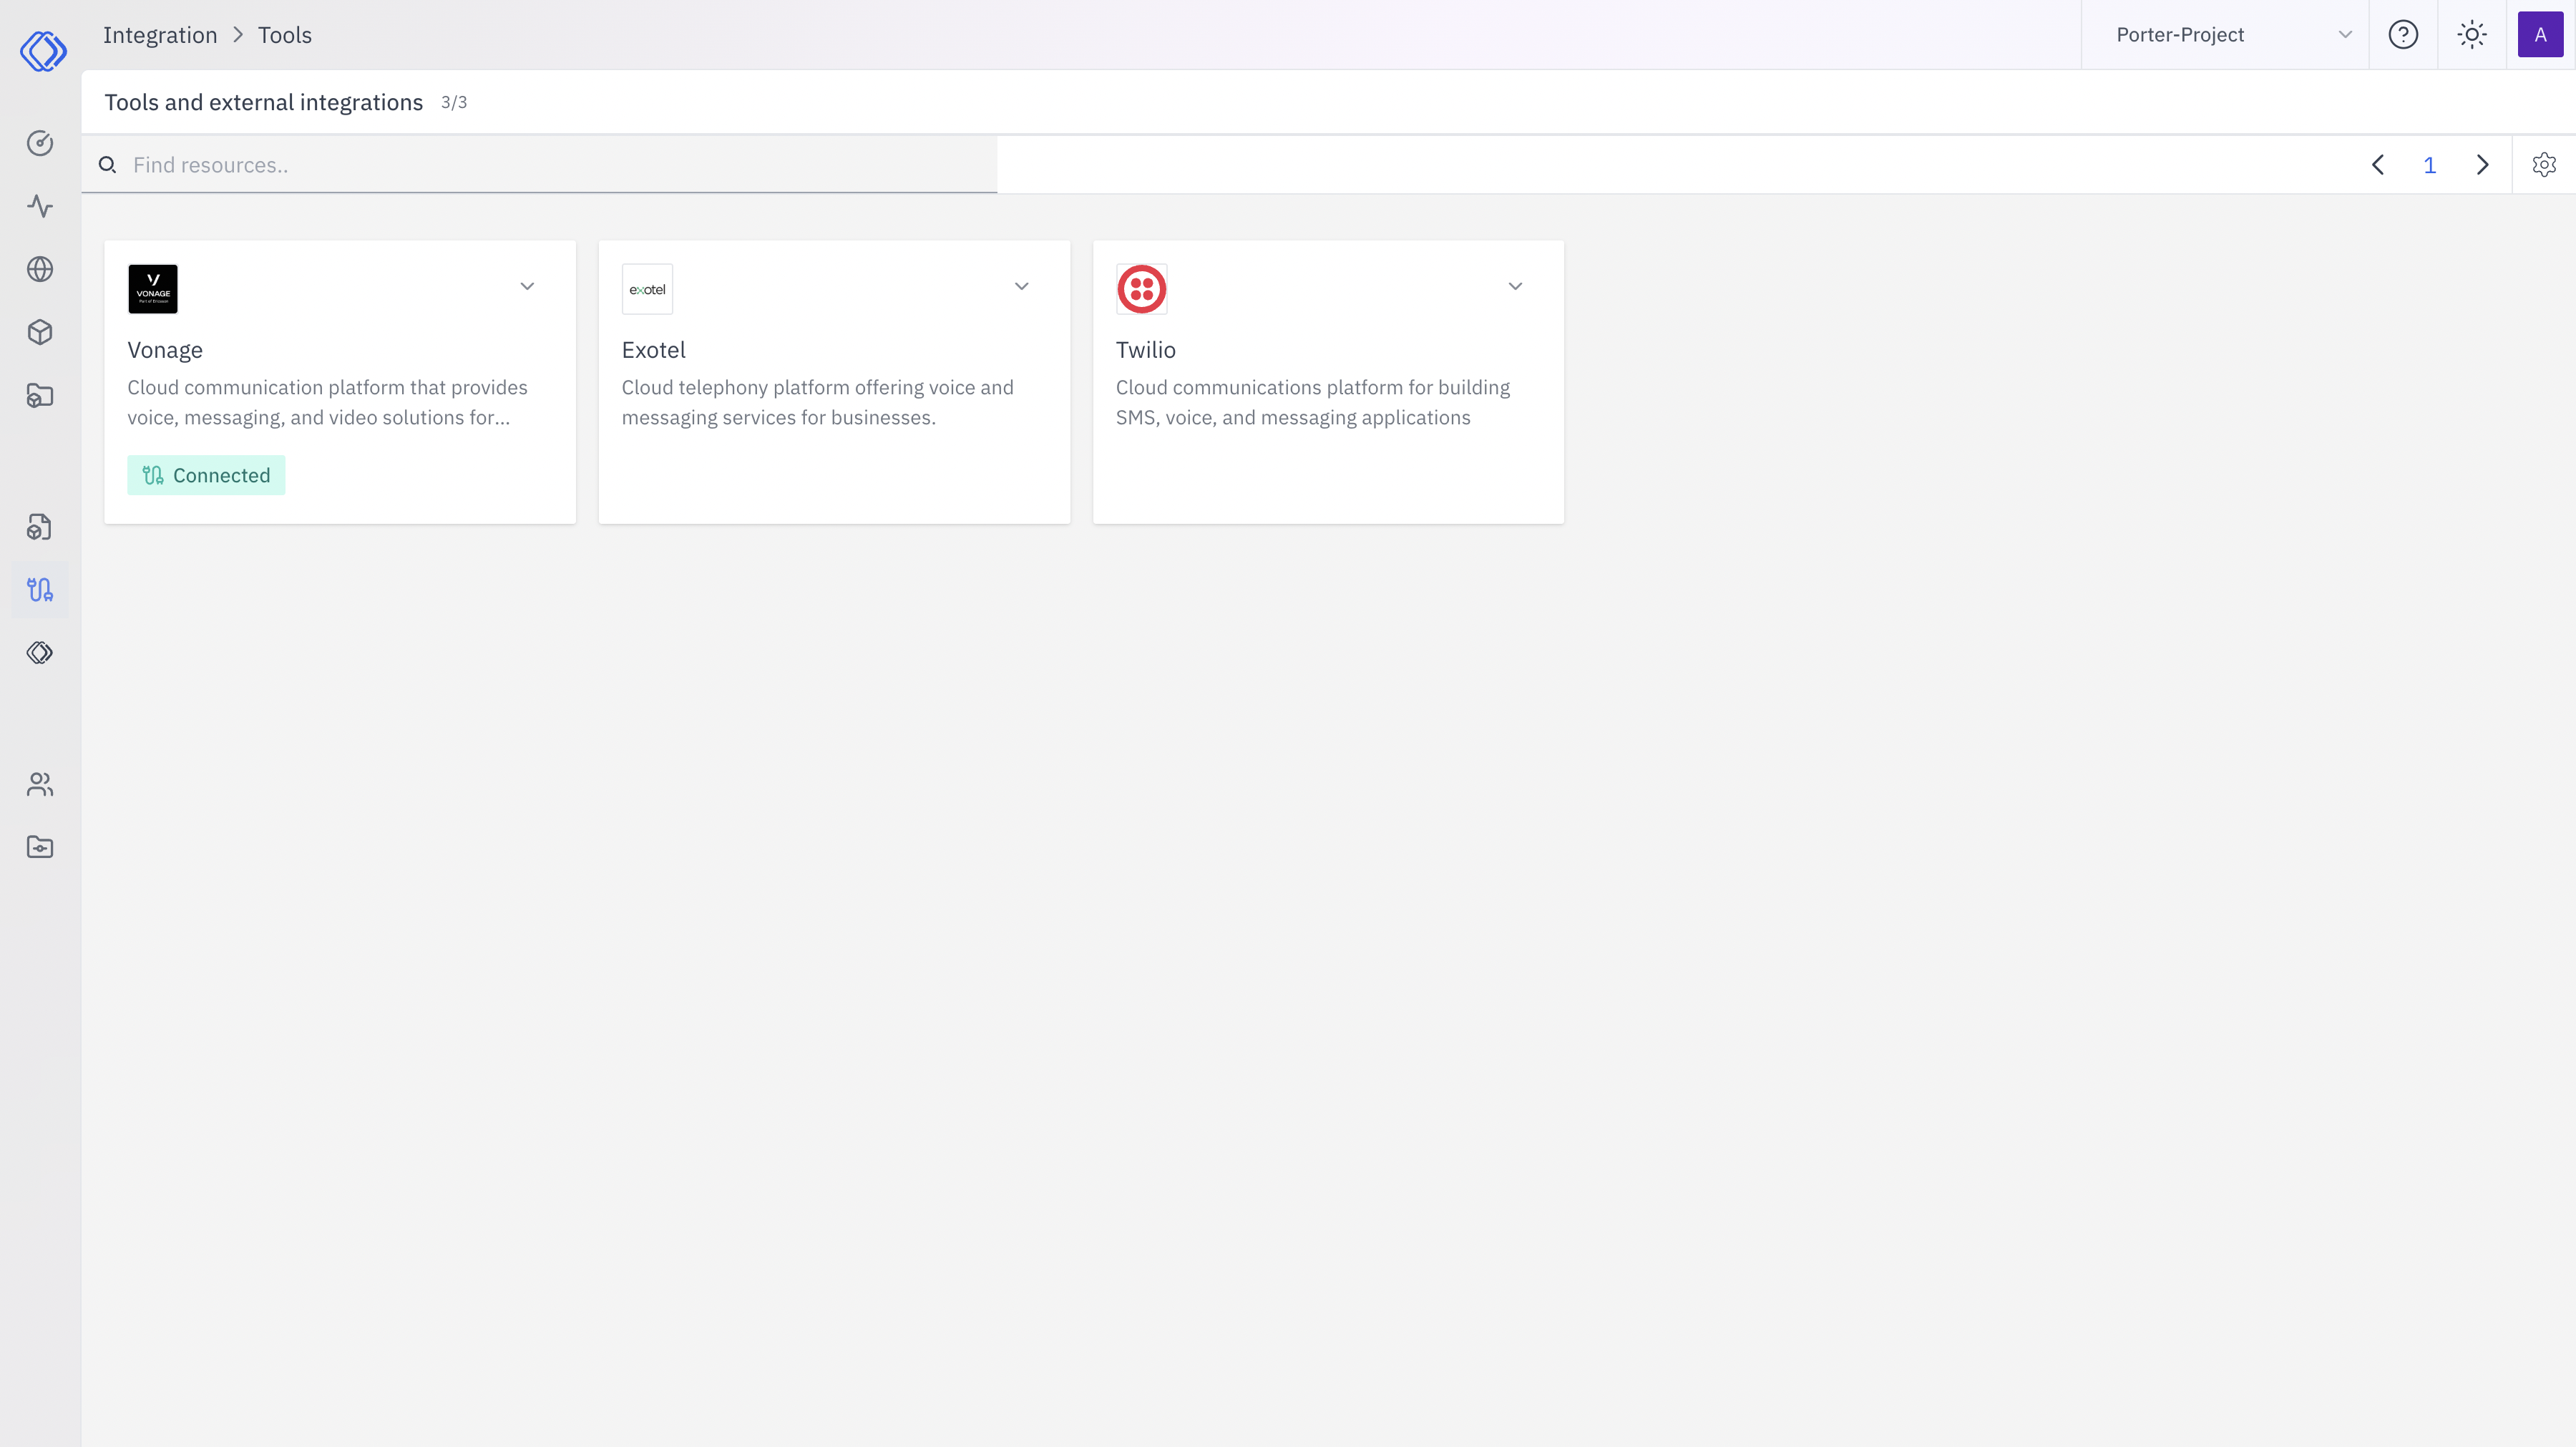 Find the **Vonage** card and click **"Setup Credential"**.
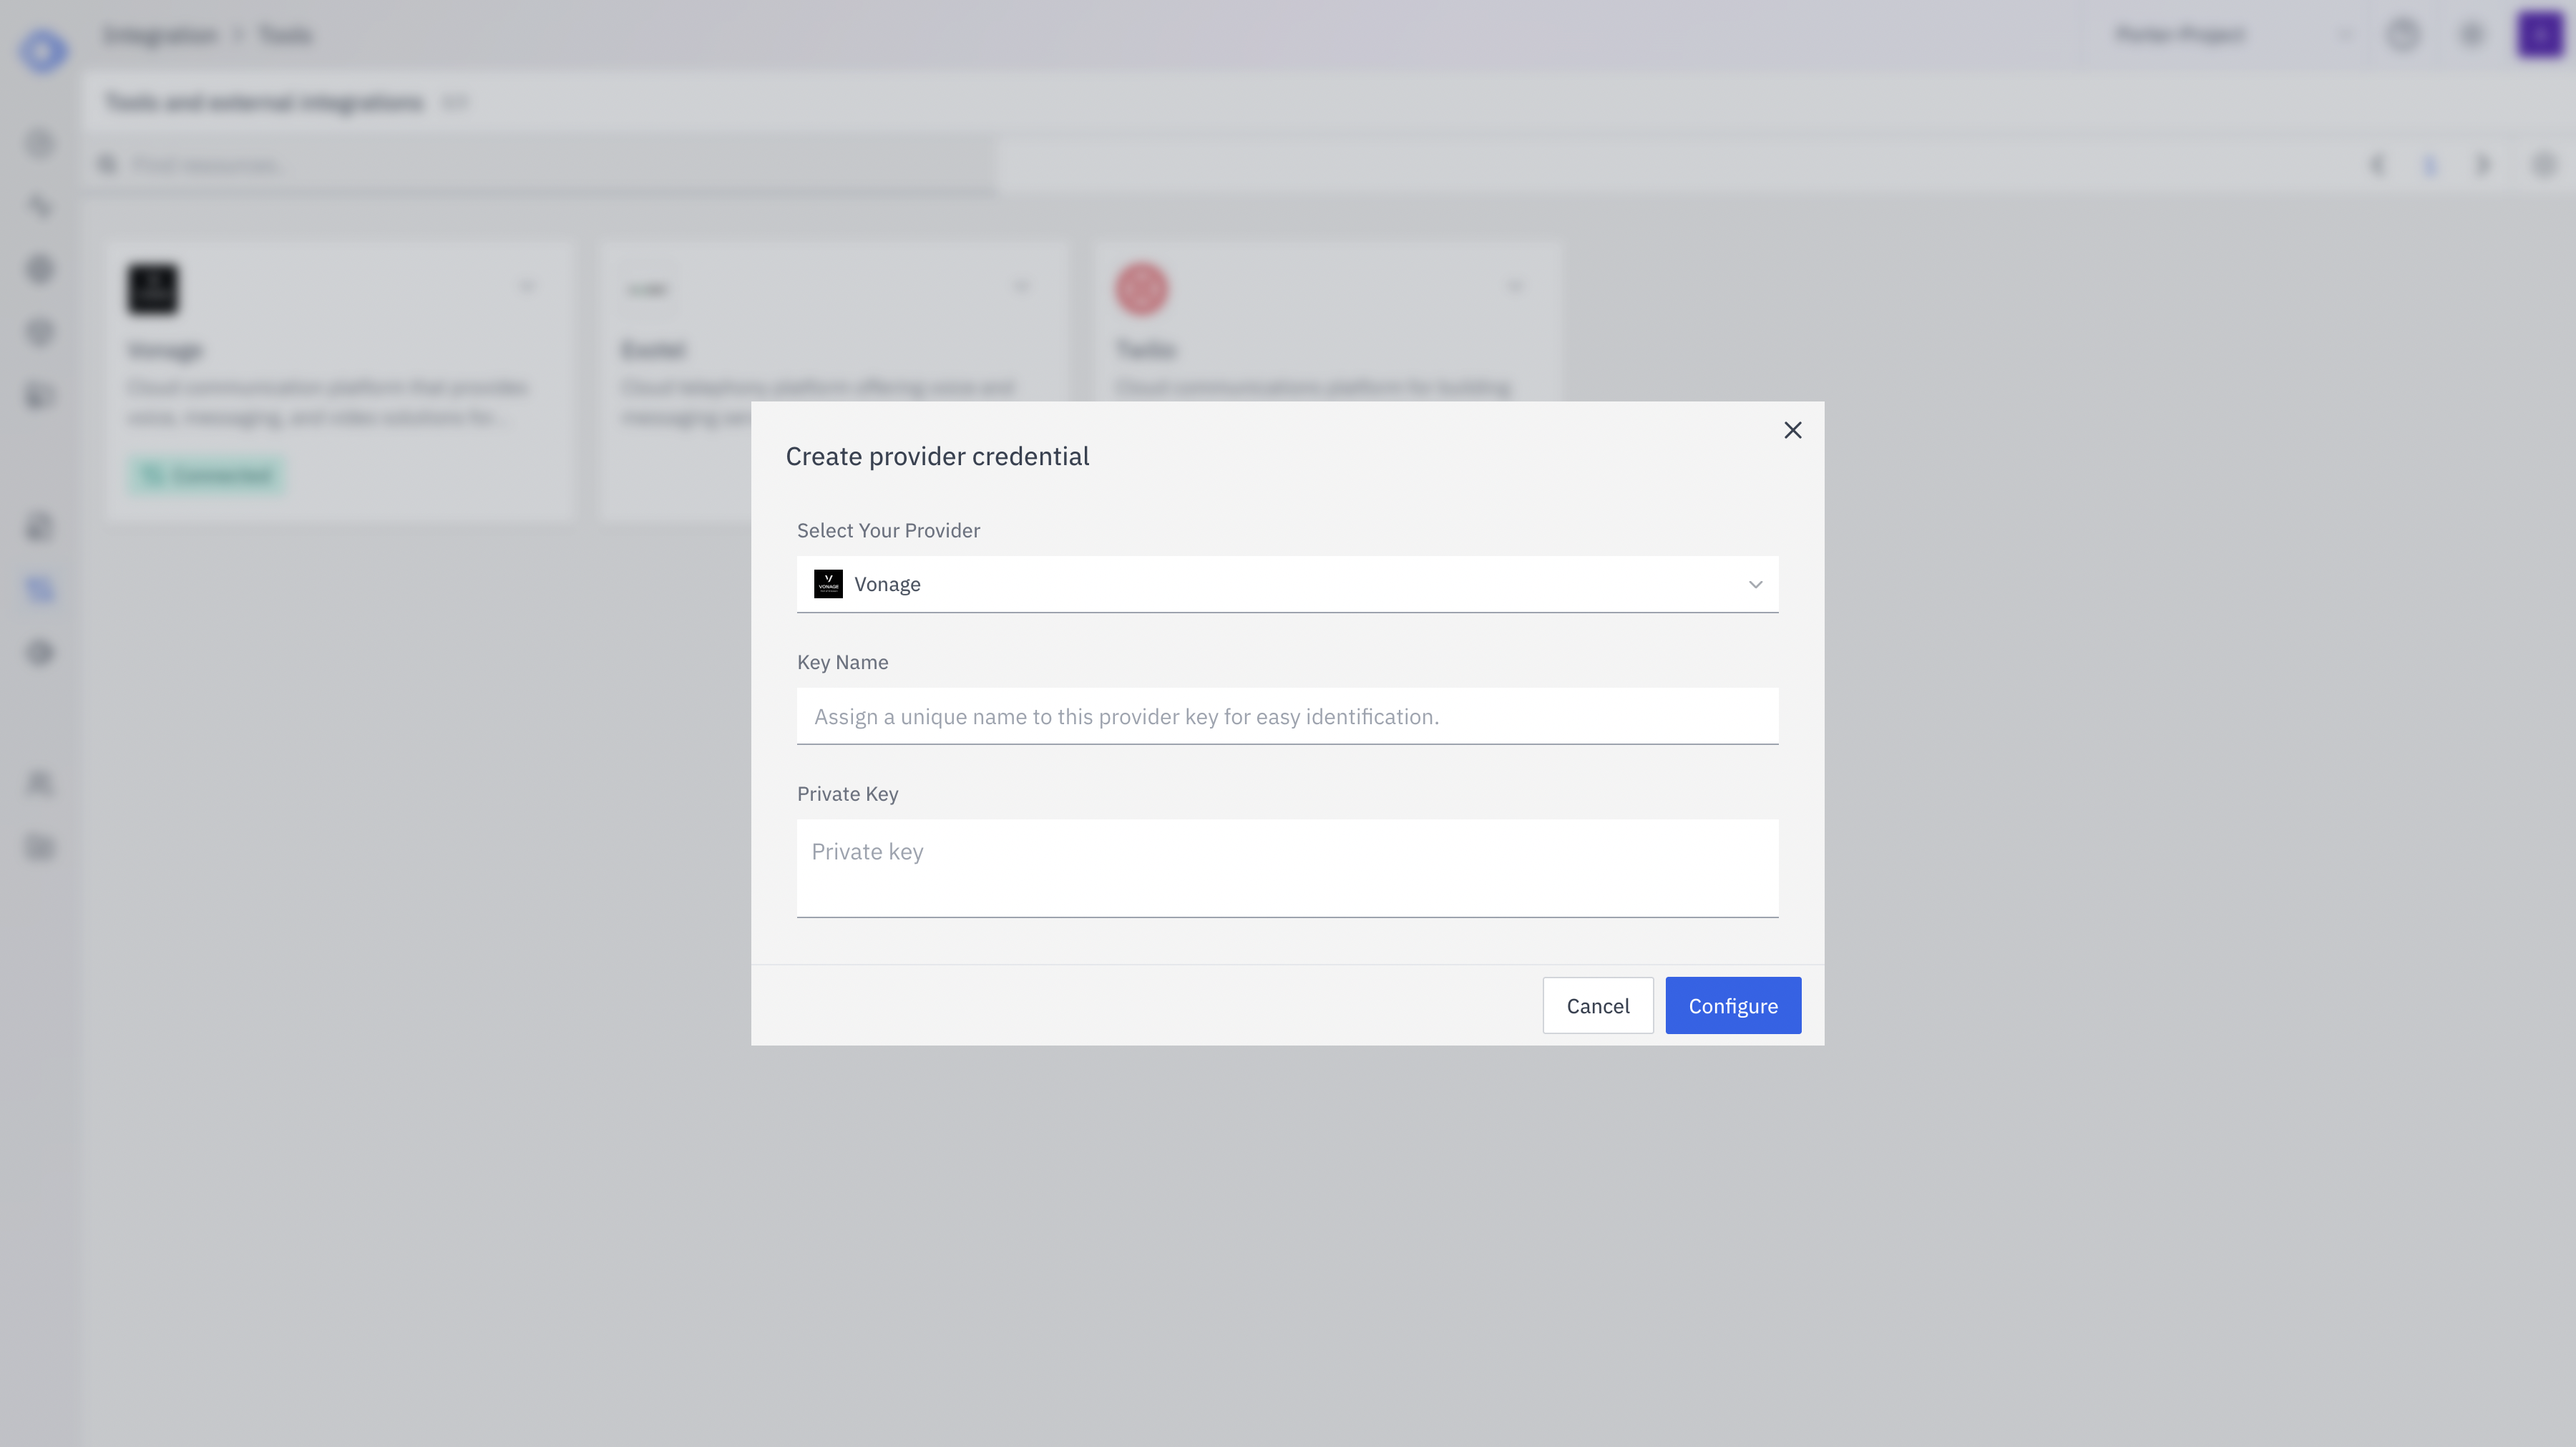 A modal will appear. Fill in the following fields:
| Field | Description | Where to Find |
| ------------------ | --------------------------------------------------------------- | -------------------------------------------------------------------------- |
| **Key Name** | A friendly name for this credential (e.g., "Production Vonage") | Your choice |
| **Application ID** | Your Vonage Application ID | [Vonage Dashboard](https://dashboard.nexmo.com/) → Applications → Your App |
| **Private Key** | Your Vonage Application private key (full PEM content) | Downloaded when creating the Vonage Application |
Click **"Configure"** to save.
The private key is the full PEM file content, not just a token. It typically begins with `-----BEGIN RSA PRIVATE KEY-----`. Paste the entire contents.
After saving, the Vonage card should display **"Connected"**. Click on it to see credential details, last updated time, and management options.
***
## Step 2: Configure Phone Deployment
With credentials saved, configure your assistant's phone deployment to use Vonage.
Navigate to **Assistants** and select the assistant you want to deploy via phone.
Click **"Deploy"** → **"Phone"** to open the phone deployment configuration page.
In the **Telephony** section:
1. Select **Vonage** from the telephony provider dropdown
2. Choose the Vonage credential you created in Step 1 from the **Credential** dropdown
3. Enter your **Phone** number — the Vonage virtual number for inbound calls and outbound caller ID (e.g., `+15551234567`)
Set up the conversation experience:
| Setting | Description | Default |
| ------------------------ | ---------------------------------------------- | ------------------ |
| **Greeting** | The first message the AI speaks when answering | *(optional)* |
| **Error Message** | Message spoken when an error occurs | *(optional)* |
| **Idle Timeout** | Seconds before prompting an idle caller | `30` |
| **Idle Message** | Message spoken when caller is idle | `"Are you there?"` |
| **Idle Timeout Retries** | How many times to retry before ending call | `2` |
| **Max Call Duration** | Maximum call length in seconds | `300` |
Select your **Speech-to-Text** (STT) and **Text-to-Speech** (TTS) providers. These determine how audio is transcribed and synthesized during the call.
Click **"Deploy"** to save. Your assistant is now ready to handle phone calls via Vonage.
***
## Step 3: Configure Your Vonage Application
Point your Vonage Application's webhook URLs to Rapida so incoming calls are routed to your AI assistant.
Go to [Vonage Dashboard → Applications](https://dashboard.nexmo.com/applications) and select your application.
Under **Capabilities → Voice**, configure:
| Field | Value |
| --------------- | ---------------------------------------------------------------------------------------------------- |
| **Answer URL** | `https://websocket-01.in.rapida.ai/v1/talk/vonage/call/{your-assistant-id}?x-api-key={your-api-key}` |
| **Event URL** | `https://websocket-01.in.rapida.ai/v1/talk/vonage/ctx/{contextId}/event?x-api-key={your-api-key}` |
| **HTTP Method** | `POST` |
Replace `{your-assistant-id}` with your Rapida assistant ID.
Under **Numbers**, link your Vonage virtual number to this application so inbound calls are routed through it.
Click **Save** in the Vonage dashboard. Your phone number is now connected to Rapida.
***
## Making Outbound Calls
Once your phone deployment is configured, you can initiate outbound calls using the Rapida API or SDKs.
```python theme={null}
from rapida import Rapida
client = Rapida(api_key="rpd-xxx-your-key")
call = client.calls.create(
assistant_id=123456789,
to_number="+15551234567",
from_number="+15559876543", # optional, uses deployment default
metadata={"campaign": "follow-up"},
)
print(f"Call queued: conversation_id={call.conversation.id}")
```
```typescript theme={null}
import { Rapida } from 'rapida';
const client = new Rapida({ apiKey: 'rpd-xxx-your-key' });
const call = await client.calls.create({
assistantId: 123456789,
toNumber: '+15551234567',
fromNumber: '+15559876543',
metadata: { campaign: 'follow-up' },
});
console.log(`Call queued: ${call.conversation.id}`);
```
```bash theme={null}
curl -X POST https://api.rapida.ai/v1/talk/call \
-H "Authorization: Bearer rpd-xxx-your-key" \
-H "Content-Type: application/json" \
-d '{
"assistant": { "assistant_id": 123456789 },
"to_number": "+15551234567",
"from_number": "+15559876543",
"metadata": { "campaign": "follow-up" }
}'
```
***
## Features
| Feature | Description |
| ----------------------- | ------------------------------------------------------------------ |
| **Inbound Calls** | Customers call your Vonage number and speak with your AI assistant |
| **Outbound Calls** | Initiate calls programmatically via SDK or API |
| **Real-time Streaming** | Bidirectional audio via Vonage WebSocket streams |
| **Call Recording** | Automatic conversation capture for review and compliance |
| **Status Callbacks** | Receive call lifecycle events via Vonage event webhooks |
| **Number Insight** | Get detailed information about phone numbers |
| **Global Numbers** | Use Vonage virtual numbers from 80+ countries |
***
## Troubleshooting
* Verify the Answer URL in your Vonage Application settings
* Ensure the URL uses `https://` and the correct assistant ID
* Confirm the phone number is linked to the correct Vonage Application
* Verify your Vonage credential (Application ID + Private Key) is correct in Rapida
* Ensure the private key is the complete PEM content
* Check that your STT and TTS providers are configured in the phone deployment
* Verify the Vonage credential is connected in **Integration > Tools**
* Ensure the `from_number` is a valid Vonage number linked to your application
* Check that the phone deployment is configured and saved
* Ensure the Event URL is configured in Vonage Application settings
* Verify the URL format includes the correct path
* Check the [Vonage API Dashboard](https://dashboard.nexmo.com/) for webhook delivery logs
***
## Related Resources
Build your voice AI assistant
Overview of phone deployment options
API reference for creating calls
View call history and transcripts
For more information on Vonage's platform, visit the [Vonage API Developer Documentation](https://developer.vonage.com/).
A modal will appear. Fill in the following fields:
| Field | Description | Where to Find |
| ------------------ | --------------------------------------------------------------- | -------------------------------------------------------------------------- |
| **Key Name** | A friendly name for this credential (e.g., "Production Vonage") | Your choice |
| **Application ID** | Your Vonage Application ID | [Vonage Dashboard](https://dashboard.nexmo.com/) → Applications → Your App |
| **Private Key** | Your Vonage Application private key (full PEM content) | Downloaded when creating the Vonage Application |
Click **"Configure"** to save.
The private key is the full PEM file content, not just a token. It typically begins with `-----BEGIN RSA PRIVATE KEY-----`. Paste the entire contents.
After saving, the Vonage card should display **"Connected"**. Click on it to see credential details, last updated time, and management options.
***
## Step 2: Configure Phone Deployment
With credentials saved, configure your assistant's phone deployment to use Vonage.
Navigate to **Assistants** and select the assistant you want to deploy via phone.
Click **"Deploy"** → **"Phone"** to open the phone deployment configuration page.
In the **Telephony** section:
1. Select **Vonage** from the telephony provider dropdown
2. Choose the Vonage credential you created in Step 1 from the **Credential** dropdown
3. Enter your **Phone** number — the Vonage virtual number for inbound calls and outbound caller ID (e.g., `+15551234567`)
Set up the conversation experience:
| Setting | Description | Default |
| ------------------------ | ---------------------------------------------- | ------------------ |
| **Greeting** | The first message the AI speaks when answering | *(optional)* |
| **Error Message** | Message spoken when an error occurs | *(optional)* |
| **Idle Timeout** | Seconds before prompting an idle caller | `30` |
| **Idle Message** | Message spoken when caller is idle | `"Are you there?"` |
| **Idle Timeout Retries** | How many times to retry before ending call | `2` |
| **Max Call Duration** | Maximum call length in seconds | `300` |
Select your **Speech-to-Text** (STT) and **Text-to-Speech** (TTS) providers. These determine how audio is transcribed and synthesized during the call.
Click **"Deploy"** to save. Your assistant is now ready to handle phone calls via Vonage.
***
## Step 3: Configure Your Vonage Application
Point your Vonage Application's webhook URLs to Rapida so incoming calls are routed to your AI assistant.
Go to [Vonage Dashboard → Applications](https://dashboard.nexmo.com/applications) and select your application.
Under **Capabilities → Voice**, configure:
| Field | Value |
| --------------- | ---------------------------------------------------------------------------------------------------- |
| **Answer URL** | `https://websocket-01.in.rapida.ai/v1/talk/vonage/call/{your-assistant-id}?x-api-key={your-api-key}` |
| **Event URL** | `https://websocket-01.in.rapida.ai/v1/talk/vonage/ctx/{contextId}/event?x-api-key={your-api-key}` |
| **HTTP Method** | `POST` |
Replace `{your-assistant-id}` with your Rapida assistant ID.
Under **Numbers**, link your Vonage virtual number to this application so inbound calls are routed through it.
Click **Save** in the Vonage dashboard. Your phone number is now connected to Rapida.
***
## Making Outbound Calls
Once your phone deployment is configured, you can initiate outbound calls using the Rapida API or SDKs.
```python theme={null}
from rapida import Rapida
client = Rapida(api_key="rpd-xxx-your-key")
call = client.calls.create(
assistant_id=123456789,
to_number="+15551234567",
from_number="+15559876543", # optional, uses deployment default
metadata={"campaign": "follow-up"},
)
print(f"Call queued: conversation_id={call.conversation.id}")
```
```typescript theme={null}
import { Rapida } from 'rapida';
const client = new Rapida({ apiKey: 'rpd-xxx-your-key' });
const call = await client.calls.create({
assistantId: 123456789,
toNumber: '+15551234567',
fromNumber: '+15559876543',
metadata: { campaign: 'follow-up' },
});
console.log(`Call queued: ${call.conversation.id}`);
```
```bash theme={null}
curl -X POST https://api.rapida.ai/v1/talk/call \
-H "Authorization: Bearer rpd-xxx-your-key" \
-H "Content-Type: application/json" \
-d '{
"assistant": { "assistant_id": 123456789 },
"to_number": "+15551234567",
"from_number": "+15559876543",
"metadata": { "campaign": "follow-up" }
}'
```
***
## Features
| Feature | Description |
| ----------------------- | ------------------------------------------------------------------ |
| **Inbound Calls** | Customers call your Vonage number and speak with your AI assistant |
| **Outbound Calls** | Initiate calls programmatically via SDK or API |
| **Real-time Streaming** | Bidirectional audio via Vonage WebSocket streams |
| **Call Recording** | Automatic conversation capture for review and compliance |
| **Status Callbacks** | Receive call lifecycle events via Vonage event webhooks |
| **Number Insight** | Get detailed information about phone numbers |
| **Global Numbers** | Use Vonage virtual numbers from 80+ countries |
***
## Troubleshooting
* Verify the Answer URL in your Vonage Application settings
* Ensure the URL uses `https://` and the correct assistant ID
* Confirm the phone number is linked to the correct Vonage Application
* Verify your Vonage credential (Application ID + Private Key) is correct in Rapida
* Ensure the private key is the complete PEM content
* Check that your STT and TTS providers are configured in the phone deployment
* Verify the Vonage credential is connected in **Integration > Tools**
* Ensure the `from_number` is a valid Vonage number linked to your application
* Check that the phone deployment is configured and saved
* Ensure the Event URL is configured in Vonage Application settings
* Verify the URL format includes the correct path
* Check the [Vonage API Dashboard](https://dashboard.nexmo.com/) for webhook delivery logs
***
## Related Resources
Build your voice AI assistant
Overview of phone deployment options
API reference for creating calls
View call history and transcripts
For more information on Vonage's platform, visit the [Vonage API Developer Documentation](https://developer.vonage.com/).